Colca Canyon Packing List & Hiking Tips
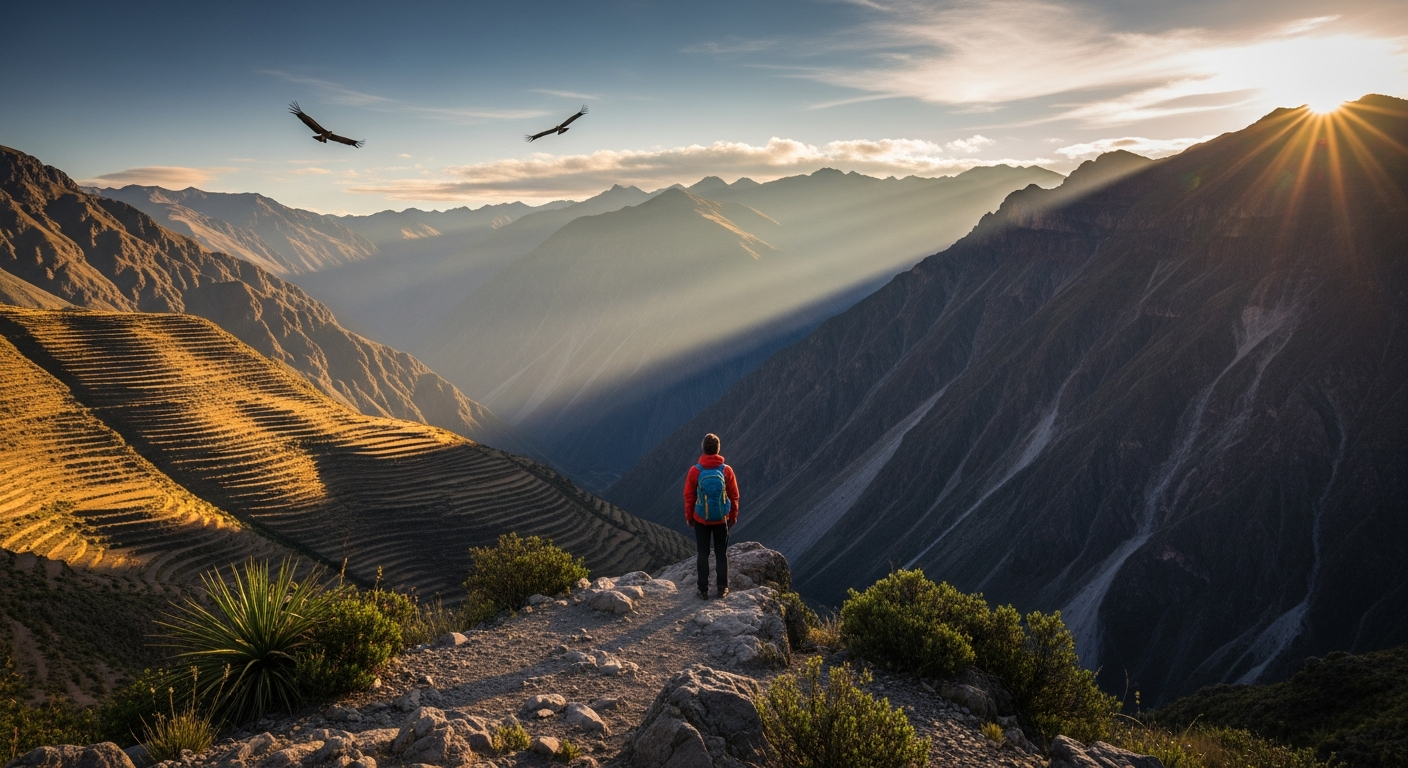
The pre-dawn chill at Cruz del Condor arrived like an audible gasp: it was 6:00 AM, my breath fogged in the light of a headlamp, and my fingers stung despite thin gloves—four hours later, I was sweating through a t-shirt on a steep, sun-baked descent to Sangalle.
That brutal 60°F swing in a single morning is the secret reason Colca Canyon packing trips into the same category as high-altitude logistics, not casual day hikes.
You’ve committed to a must-visit canyon in southern Peru, but online packing lists either tell you to “bring layers” or read like a climbing-store catalog.
The real problem is practical: Colca Canyon combines high elevation (Cruz del Condor is 3,800m+), steep 1,200m descents/ascents, desert heat by midday, and limited village resupply below the rim. That makes overpacking or underpreparing dangerous and time-costly when your vacation window is short.
This guide gives you the complete, practical packing plan that solves three big pain points: how to pack for the 60°F temperature swing, what to bring for altitude management, and how to tailor your kit to the exact trek type you choose (Arequipa day-trip condor viewing, 2-day descent to Sangalle, or a 3-day canyon traverse). You’ll get step-by-step checklists, real quantity recommendations, and at least two insider details most guides miss.
Quick orientation: Arequipa sits at 2,335m and is the usual launch point; Colca Canyon reaches roughly 3,270m of depth, with key viewpoints around 3,800m.
The drive from Arequipa to the Colca zone is about 160 km and typically takes 3–4 hours, so plan logistics and acclimatization accordingly. Read on for the secret tricks that keep you comfortable, safe, and ready to watch condors glide inches over your head.
Understanding Colca Canyon’s Ultimate Packing Challenges

Colca Canyon presents a rare overlap of challenges: high-altitude physiology, dramatic diurnal temperature swings, steep technical terrain, and limited infrastructure once you descend.
This combination demands a packing approach tied to your trek plan, not a one-size-fits-all list. If you ignore acclimatization or misjudge water needs for the descent, you’ll trade breathtaking views for avoidable misery.
Why Colca Canyon Demands Trek-Specific Preparation
Colca Canyon’s depth and rim elevations make it more like high-altitude canyon hiking than a simple nature walk. Cruz del Condor viewpoints sit at 3,800m+ and the canyon floor near Sangalle is typically around 2,600m, so your body experiences big pressure and oxygen changes during a single day. The route surfaces include packed dirt, loose scree, and uneven stone steps; that means ankle support and controlled braking on descents matter.
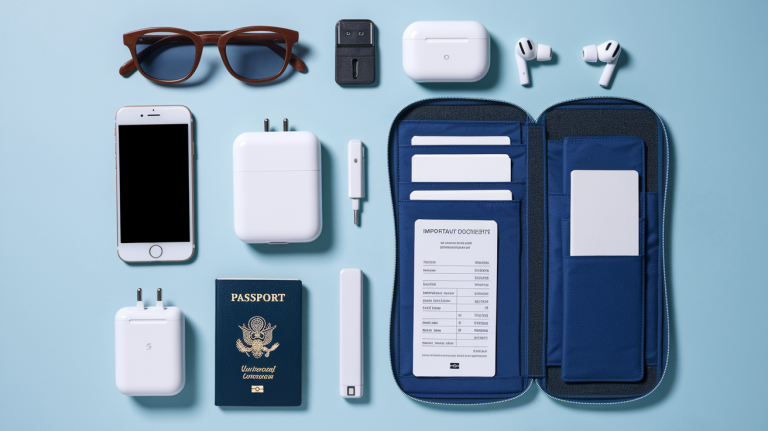
Two practical details most guides miss: first, pack electricity expectations—villages in the canyon have very limited charging (bring a 20,000–30,000 mAh power bank); second, carry cash in small denominations (10–50 PEN) because most local vendors accept no cards. Both details save time and frustration once you’re below the rim.
Beyond electronics and cash, notice the simple infrastructure reality: public toilets at viewpoints are rustic and sometimes require a small fee (1–3 PEN).
If you need reliable sanitation or hot showers, book a lodge in Cabanaconde or Sangalle in advance—particularly in July–August when Peruvian families travel.
Also, know that water sources below the rim can be untreated and scarce; treat or boil if you plan to refill and always maintain at least 2–3L on your person during long descents.
The Acclimatization Factor You Can’t Skip
Altitude sickness (soroche) is the number-one comfort killer here. Arequipa’s 2,335m helps, but many day-trippers still hit the 3,800m viewpoint unacclimated.
The actionable rule: spend at least 2 nights in Arequipa before attempting Cruz del Condor or a multi-day descent. Bring acetazolamide (Diamox) if advised by your doctor, and pack medicine for headaches, nausea, and rehydration salts—these are practical items, not optional luxuries.
Local secret: coca leaf tea is commonly used by guides to ease mild symptoms and support acclimatization; it’s culturally normal and widely available. If you have medical contraindications, consult a physician before travel.
More nuanced advice: acclimatization is about rest and hydration, not pushing into a canyon itinerary to “get it done.” Walk slowly for the first 24–48 hours, avoid heavy meals on the first night, and limit alcohol—a glass of wine at 2,300m bites differently than at sea level.
Pulse oximeters are inexpensive and helpful if you’re monitoring symptoms; expect resting SpO2 in the 88–94% range at rim altitudes.
If you see a rapid descent in SpO2 with alarming symptoms (severe headache unresponsive to meds, vomiting, confusion), descend immediately and seek medical attention.
Takeaway: match your gear to the altitude you will stand in and the time you’ll spend there—this is the difference between an unforgettable morning watching condors and spending the day sick in a bed in Cabanaconde.
Colca Canyon Trekking Tips: Clothing for Extreme Layering

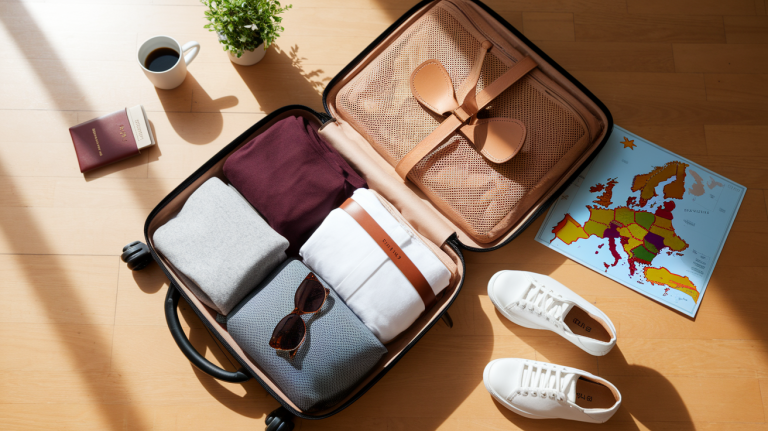
Layering is the entire game in Colca Canyon. You’ll need a system that goes from near-freezing pre-dawn to 20–25°C (68–77°F) midday sun, and back to chilly nights if you camp. Here’s the practical, tested layering architecture that covers day trips and multi-day treks alike.
The Base Layer Foundation for High-Altitude Comfort
Start with non-cotton base layers: a lightweight long-sleeve top and leggings in merino wool or synthetic fabrics. For day-trippers bring one set; multi-day trekkers should bring two sets so you can sleep in a fresh layer and reduce dampness in your sleeping bag. Merino’s odor control is useful if you plan to go multiple days without laundering in remote lodges.
- Quantity: Day trip — 1 set; Multi-day — 2 sets.
- Why: Moisture-wicking prevents chilling during early-morning waits at Cruz del Condor and cuts sleep chills at night.
Practical extras: pack a UV neck gaiter that doubles as a balaclava at dawn and sun protection at midday. Bring a lightweight sleep shirt if you’re sensitive to cold while sleeping—temperature drops at altitude can be deceptive. If you sweat a lot, treat base layers like consumables: rotate and air them each evening.
Mid-Layers and Insulation That Pack Small
A compressible fleece or lightweight down jacket is the go-to mid-layer. Add a packable puffy vest as the hidden trick—vests keep your core warm while leaving arm mobility free for trekking poles and camera work. Convertible/zip-off hiking pants are perfect for switching from full legs at dawn to shorts by noon.
- Puffy jacket or fleece: essential; aim for something compressible to fist-size.
- Puffy vest: insider pick for mobility and layered warmth.
- Convertible hiking pants: one pair replaces pants and shorts for lighter packing.
Size and warmth guidance: a 200–300g down jacket or a 200 weight fleece tends to be sufficient for most travelers combined with a wind shell. Down loses insulation when wet, so if you visit in the rainy season (Dec–Mar) prefer treated down or synthetic insulation. On nights in Sangalle or Cabanaconde, a mid-layer plus a sleeping bag rated to 0–5°C will keep most people comfortable; if you sleep cold, add a 15–20°C liner or choose a more technical -5°C bag.
Outer Shell Protection Against Wind and UV
Windproof shell is non-negotiable at the rim—wind chill can make 10–15°F difference. In the wet season (December–March) add a lightweight waterproof shell with taped seams. Also pack a UPF-rated long-sleeve sun shirt—altitude multiplies UV intensity, and sunburn happens faster than you expect.
Packing takeaway: prioritize versatility and weight. For most travelers a layering kit of base layer, fleece, puffy jacket, vest, and wind shell covers all conditions without excessive bulk. My own kit for a 3-day traverse weighs 1.8–2.5 kg for clothing (excluding boots) and fits neatly into a 40L pack, leaving room for food and safety gear. If you carry more electronics, up the power bank size and consider a small dry bag to protect layers from sudden downpours.
How To Hike Colca Canyon: Footwear and Foot Care Essentials

Colca Canyon’s steep, rocky trails are the real test of your footwear choice. The safe rule is ankle-supporting, broken-in hiking boots for most people; trail runners work only for experienced hikers carrying light loads. Foot care is as crucial as boots—poor toenail care and slick socks turn descent kilometers into painful memories.
Boot vs. Trail Runner Debate for Steep Paths
Hiking boots with ankle support protect on uneven stone steps and loose scree common on the descent and ascent around Cabanaconde. If you’re on a 2-3 day trek and carrying 10–15 kg, choose boots. If you’re a fast, experienced hiker carrying <40L and minimal weight, trail runners are acceptable—only if you’re confident on technical descents.
Specific models: midsolve hiking boots with Vibram soles or equivalent offer traction and braking control; look for 3–4 mm lug depth for the gritty trails. For trail runners, prefer models with sturdy uppers and rockplate protection. Break in footwear for at least two 10–15 km hikes with load before departure to avoid painful surprises. In my experience, the comfortable but pillowy new boot feels great in the shop and fails after 4 hours of descent because the heel isn’t stabilized—test on descents when breaking in.
The Blister Prevention System for 1,200-Meter Elevation Changes
Start with a friction-minimizing sock system: thin liner socks under thicker wool or synthetic hiking socks. This double-sock trick is the local guide secret that protects feet on long descents. Pre-tape known hotspots (heels, outer pinky toe) with narrow athletic tape before a long day.
- Socks: Day trip — 1 pair of wool/synthetic hiking socks; Multi-day — 2–3 pairs plus 2 liner socks.
- Blister kit: moleskin, adhesive blister pads, small roll of athletic tape, antiseptic wipes, band-aids.
- Nail care: trim toenails short before travel to avoid black nails on steep descents.
Additional tips: apply a small amount of anti-chafe balm to inner thighs and underarms before long hikes to prevent rubbing when sweaty. Carry foot powder for mornings in Sangalle to dry damp boots and reduce blister risk. That lightweight sponge and a bit of soap in the morning go a long way for comfort and morale on multi-day trips.
Recovery and Camp Footwear
Bring camp sandals or lightweight slip-on shoes for Sangalle and lodges—your feet will thank you after 6+ hours in boots. Gaiters are optional for the dry season to stop dust and little pebbles from getting into your boots.
Footwear takeaway: if you compromise on boots to save weight, accept the trade-off—you’ll need superior foot care, conservative steps on descents, and more rest stops. I once saw a fast hiker in trail runners blow a toenail after misjudging a scree slope—she finished the trek but paid in painful, slow steps for the remaining days. Choose footwear to match your load, fitness, and risk tolerance; there’s no shame in boots if it keeps you moving comfortably.
Condors of Colca Canyon: Gear for the Ultimate Viewing Experience

The following section contains specialized gear and timing advice specifically for condor viewing and photography at Cruz del Condor. Bring layers, optics, and patience—the condor sighting is an unforgettable payoff but requires preparation.
Optical Equipment for Breathtaking Wildlife Encounters
Binoculars of 8×42 or 10×42 turn distant specks into magnificent birds and are a small, lightweight upgrade with huge results; expect to spend your morning watching through them. For photography, a telephoto lens of 200mm minimum is the minimum for decent condor images—300mm+ is better. If you prefer to travel light, a recent smartphone with good optical zoom will produce memorable images but will not replace a tele lens for detailed shots.
- Binoculars: 8×42 or 10×42 for clear condor views.
- Camera: telephoto-capable camera or smartphone with good zoom.
- Glove liners: thin touchscreen-capable liners to operate optics in cold at dawn.
Practical camera notes: use a monopod rather than a tripod if you want faster repositioning—tripods can be awkward in crowds and limited flat space. For exposure, condors against sky demand fast shutter speeds (1/1000s+) to freeze wing beats; set continuous autofocus and burst mode. Don’t forget a lens cloth—dawn dew and dusty wind will smudge optics quickly. I always pack one lens cap leash to avoid the heartbreak of losing a cap on the stone ledges.
Timing and Positioning Essentials
Condors use thermal updrafts generated as the canyon warms; the peak flight window is about 7–9am, so arrive at Cruz del Condor by 6:00–6:30am to claim a good spot and set up gear. Bring a headlamp for the approach—it’s still dark leaving your hotel at that hour. Expect to stand still for 1–2 hours in cold wind before the condors arrive; your layering system should keep you comfortable without bulk that restricts movement when they pass close.
Positioning tip: sit or stand on the rim-facing stone benches near the central lookout and avoid the fence line crowd choke points—angling slightly toward the eastern viewpoint gives the best chance to see condors soar toward you on thermals. Guides often know the “right side” of the viewpoint depending on prevailing winds; ask a local guide or lodge host which side the condors favor that morning. If you’re photographing, bring a small beanbag to steady your lens against a low wall when a tripod is impractical.
Protecting Your Gear at Extreme Altitude
Cold drains camera batteries quickly—keep spares in an inside jacket pocket close to your body to keep them warm. When moving from cold dawn air into the warm sun, prevent lens fog by allowing equipment to warm gradually; store cameras in a sealed bag when moving between temperature extremes to reduce condensation. These small steps preserve functionality when it matters most.
Security note: keep expensive gear in plain sight only when actively using it—crowds and opportunistic theft can be an issue at busier viewpoints. A small camera strap with a locking carabiner to attach to your belt or pack adds security without becoming a burden. Also, ensure memory cards are backed up if you have the chance to charge and transfer in Arequipa—if a card fails in the canyon, you might lose those once-in-a-lifetime shots.
Condor viewing takeaway: show up early, have optics, dress for stillness, and protect batteries from cold.
Pull quote: “Arriving at Cruz del Condor at 6:00 AM with binoculars and warm gloves turns a distant dot into a 10-foot wingspan passing inches above your head.”
Arriving at Cruz del Condor at 6:00 AM with binoculars and warm gloves turns a distant dot into a 10-foot wingspan passing inches above your head.
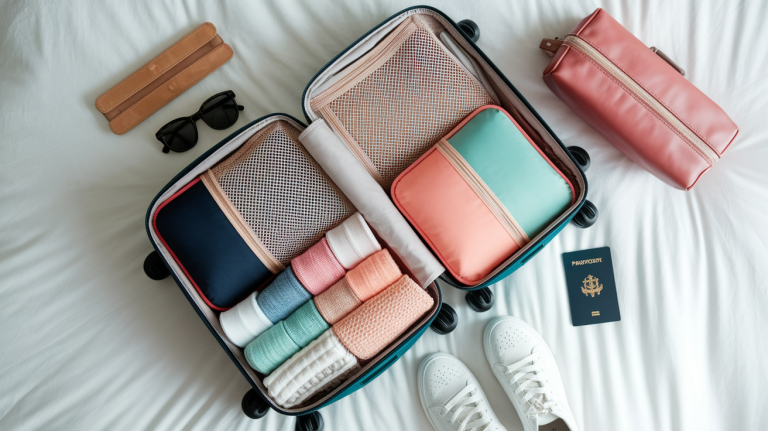
Below are the practical checklists you can use right away. If you have limited vacation time, use the day-trip list and prioritize acclimatization nights in Arequipa; if you’re going multi-day, accept carrying a 40–50L pack for safety and comfort.
Where to start
Single most important takeaway: pack for the altitude and temperature swing rather than the distance—get acclimatized in Arequipa, bring a coherent layering system, and choose boots or trail runners based on load and technical confidence. Your next action: decide which trek type fits your schedule (Arequipa day-trip for condors only, 2-day descent to Sangalle, or a 3-day traverse), then print the matching checklist below and confirm you have at least 3L hydration capacity, a windproof shell, ankle-supporting footwear (or solid trail runners if lightweight), and a 20,000 mAh power bank. That single decision—day trip versus multi-day—reduces packing uncertainty and avoids overpacking that eats into limited vacation time, increases cost, and risks missing local village experiences because you have the wrong gear.
Day-Trip (Condor View) Packing Checklist — 366–500 words
If your plan is a dawn condor viewing from Arequipa and back the same day, your priorities are warmth at altitude, optics, and simple comfort for a long day in a bus and standing at a viewpoint. Keep it light: a daypack of 20–28L is perfect, and below are the exact items I carry and why each matters.
- Backpack: 20–28L daypack with sternum strap and rain cover (cost: 80–250 PEN depending on model).
- Layers: merino long-sleeve base, light fleece or puffy, windproof shell. I use a 200g puffy and a shell—total clothing weight ~800–1,200 g.
- Footwear: sturdy trail runners or light boots, broken-in.
- Hydration: 2–3L bladder+bottle; bring electrolyte sachets (20–30 PEN for a pack of 10).
- Optics: 8×42 binoculars, small camera or phone; glove liners to operate devices.
- Electronics: 20,000 mAh power bank (150–300 PEN), phone, usb-c cable.
- Health: Diamox if prescribed, headache tablets, anti-nausea, rehydration salts, sunscreen SPF 50 (30–60 PEN), lip balm with SPF.
- Cash: 50–100 PEN in small bills for snacks, toilet fees, or local tips.
- Misc: headlamp for early departures, small first-aid kit, sunglasses (polarized), hat (warm beanie & sun hat).
Timing note: expect a 3–4 hour round trip from Arequipa including stops. Costs for a guided day tour vary: shared tour 50–120 PEN (includes transport and guide); private transport costs 200–400 PEN+. If you prefer independent travel, the Cruz del Condor viewpoint has a small entrance fee (about 10–20 PEN). Remember to tip drivers and guides—10–20 PEN per person is customary for a good morning.
What many travelers forget: a small thermos with warm drink transforms the condor wait. Fill it in Arequipa (cafés will fill a 500 ml thermos for 4–6 PEN) with coca tea or coffee and it keeps you comfortable for the first hour at the viewpoint. Also bring a compact sit pad for stone benches—simple comfort improves patience and photos.
2-Day Descent to Sangalle Packing Checklist — 366–500 words
The 2-day descent to Sangalle (hot springs and oasis) requires more thoughtful packing: overnight gear, more hydration and food, and an acceptance that you’ll be carrying additional weight. I recommend a 40L pack for this trip—small enough to be manageable but big enough for a sleeping bag, extra layers, and food.
- Backpack: 40L pack with hipbelt; expect to carry 10–15 kg fully loaded.
- Sleeping: 2-season sleeping bag (comfort 0–5°C) or a liner if lodge provides blankets; inflatable pillow or small stuff sack with clothes.
- Clothing: base layers x2, fleece or puffy, wind shell, 1 spare set of underwear, convertible pants.
- Footwear: sturdy hiking boots or supportive trail runners; camp sandals.
- Hydration: 3L capacity minimum; water treatment tablets or SteriPEN if you plan to use local sources (treatment tablets cost ~15–30 PEN per pack).
- Food: snacks—nuts, dried fruit, energy bars plus saltier snacks for altitude appetite shifts; many lodges provide meals but bring extras for long afternoon sections.
- Toiletries: biodegradable soap, quick-dry towel, toothbrush, personal meds.
- Safety: headlamp, basic first-aid kit, whistle, small multi-tool.
- Money: 50–80 PEN in small bills for lodge fees, snacks, hot springs, and tips.
Cost guidance: basic dorm/hostel in Sangalle can be 40–100 PEN per person; private bungalow or lodge 120–250 PEN. Guides are optional—if hiring one expect 100–200 PEN per day depending on group size and if meals are included. Mules or porters are available from local communities for about 80–150 PEN per day if you want to ride sections back up (useful for tired knees on ascent day).
Actionable terrain tips: descend using trekking poles to reduce impact on knees—many travelers skip poles and pay with sore joints on ascent. Keep a high cadence and short steps on steep sections; that’s more efficient and less damaging than long strides. At Sangalle, protect your device from humidity—store electronics in zip-lock bags and dry them in the sun each morning to avoid moisture damage.
3-Day Traverse Packing Checklist — 366–500 words
A 3-day traverse across Colca Canyon is the most gear-intensive option and requires planning for remoteness. Expect to be away from reliable electricity and hot showers for one to two nights depending on lodges chosen. This itinerary is rewarding but heavier—plan a 45–50L pack to carry all essentials comfortably.
- Backpack: 45–50L with solid hipbelt; plan to carry 12–18 kg depending on food/water needs.
- Sleeping: 3-season sleeping bag (-5 to 0°C acceptable), sleeping pad if camping or if lodge bedding is uncertain.
- Clothing: 2 base sets, fleece, puffy jacket, vest, full rain jacket with taped seams (Dec–Mar), 2–3 pairs socks, spare underwear.
- Footwear: broken-in boots, camp sandals, gaiters if dusty season.
- Food: meals if self-catering (lightweight dehydrated meals), plus high-calorie snacks; stove if camping (canisters available? not always).
- Water: 3–4L capacity, water treatment system, extra collapsible bottle for emergency.
- Navigation & safety: map or downloaded GPS route, satellite messenger or personal locator beacon if going remote, headlamp with extra batteries.
- Toiletries: more thorough kit, hand sanitizer, toilet paper and zip bag for waste if no facilities.
Expense planning: lodges in remote areas range widely—expect 80–250 PEN per night depending on amenities. If you camp, permit and campsite fees are minimal but logistically more complex; bring a two-person 3-season tent and a compact stove. If hiring a guide and porter service, budget 200–400 PEN per day for a guide and 100–200 PEN per day per porter, plus food costs and tips.
Expert insight: plan your water strategy carefully. Some canyon sections have seasonal streams but they can dry during the hot season. I ration and plan to refill only at reliable points—ask locals and lodge hosts for confirmed refills. A small pump filter (e.g., Sawyer Mini) is lightweight and reliable for multi-day traverses; it saves you from carrying excessive water weight while also preventing illness from untreated sources.
Essential Safety, First Aid and Emergency Tips — 366–500 words
Safety in Colca Canyon is about preparation and honest self-assessment. The canyon is remote, weather changes quickly, and cell coverage is intermittent. Your safety kit is not just for dramatic rescues—it’s for managing blisters, altitude headaches, and minor strains so your trip stays enjoyable.
- Personal med kit: ibuprofen/acetaminophen, anti-nausea (e.g., dimenhydrinate or prescribed equivalent), antihistamine, personal prescriptions in original packaging.
- Altitude meds: Diamox only if recommended by your doctor (start 24–48 hours before ascent if using).
- First-aid: compression bandage, adhesive dressings, moleskin, antiseptic wipes, antibiotic ointment, tweezers.
- Emergency: whistle, space blanket, small mirror for signaling, headlamp, basic repair kit for gear.
Practical emergency planning: leave your exact itinerary and emergency contacts with your Arequipa accommodation and check in with them before departing. If hiring a guide, ensure they’re registered with local authorities—a legitimate guide will have local identification and often a small badge. Know the names of nearby communities (Cabanaconde, Pinchollo, Sangalle) and carry maps with local GPS coordinates saved offline. Download offline maps (Maps.me, Gaia) with the route and waypoints marked.
Common tourist mistake: underestimating descent difficulty and overestimating your knees. Bringing only trekking poles and not conditioning your knees leads to painful ascents back to the rim. Practice downhill hiking on local trails prior, use poles with shock-absorbing tips, and pack a light knee sleeve if you have prior issues. If you plan to take mules on the ascent, confirm pricing and mule availability beforehand—during high season supply can be limited.
Local etiquette and safety culture: respect local rules around sacred sites and private lands; ask before photographing people in villages and offer a small tip if a host invites you into a family compound. If you bring a drone, get explicit permission from community leaders and be mindful of Peru’s airspace regulations—fines or confiscation are possible if rules are violated.
Logistics: Visas, Transport, Costs and Best Months — 366–500 words
Practical logistics make or break a Colca Canyon trip. From visa requirements to timing your visit for condor season, the right planning avoids last-minute scrambling. Here’s a compact run-down of what I used planning my trips and what saved time and money.
Visas: Most travelers from the US, EU, Australia, Canada, and many other countries receive a tourist visa on arrival for 90–183 days—confirm with your national consulate before travel. Always carry copies of your passport, and leave an electronic copy with a trusted contact back home. If you’re planning multiple border crossings (e.g., into Chile), check reciprocity fees and entry stamps as they affect re-entry to Peru for some nationalities.
Transport: buses and shared minivans from Arequipa to Chivay/Cabanaconde cost about 10–25 PEN. Tours that include Cruz del Condor pick-up run 50–120 PEN for a shared morning tour (includes pickup, driver, and guide). Private car hires range 200–500 PEN depending on vehicle and negotiation. If self-driving, allow extra time for unpaved stretches and winter rains that can wash roads during the rainy season.
Cost breakdown: budget travelers can do day tours for 50–120 PEN. A 2-day guided trek with lodging and meals is typically 200–500 PEN per person depending on standard of lodging and group size; a private guide increases cost. Multi-day independent treks are cheaper in cash but require initial investment in gear and water treatment systems. Lodges: dorms 40–80 PEN/night, private rooms 120–250 PEN. Food: simple meals 8–25 PEN in local eateries, lodge dinners 20–60 PEN.
Best months: April–November are driest and clearest; June–August are coldest but excellent for condor sightings because thermals are strong in the mornings (clear skies). Avoid December–March unless you want solitude and don’t mind occasional trail closures due to heavy rains and flooded riverbeds. Shoulder seasons (April–May, September–October) offer mild weather, fewer crowds, and good lodge availability.
Insider travel timing: arrive into Arequipa at least two nights before your planned canyon day; use the first day to walk around the city, sip coca tea slowly, and take a light walk to help acclimatize. If possible, schedule your canyon plans in the middle of your overall Peru trip rather than the start; bodies adjust better after a few days at altitude in Cusco or Arequipa rather than hitting Colca on day one after a long international flight.
Cultural Note and Etiquette
One small cultural detail repaid me many times: greet people in Quechua or Aymara phrases if a local uses their language — a simple “Allin p’unchay” (good day) or “Sulpayki” (thank you) earns instant goodwill. Respect agricultural terraces and private fields — don’t wander off marked trails because families tend plots and llamas; ask before entering any homestead or taking photos of people, especially in remote communities where customs differ.
Tip culture: tipping is appreciated for guides and drivers—10–20% depending on service. If invited into a home or offered coca leaves, accept politely; coca is a normal part of social and ceremonial life here. Avoid public criticism of local customs—ask questions with curiosity rather than judgment. Your respectful approach unlocks stories and better experiences, like being offered a warm meal or a local guide’s secret viewpoint.
Final Checklist & Next Steps
Final packing decision: choose your trek type and then run through the relevant checklist ABOVE. If you have limited time: do the Arequipa acclimatization nights, then the day-trip for condors. If you have more energy and a love for remote hiking, take the 2 or 3-day options but budget for a porter or mule if you value your knees on the ascent.
Before you leave: test your footwear, confirm guide/transport bookings, notify your accommodation of departure times, and copy essential documents (passport and insurance) to the cloud. Pack a small zip-lock with a day’s worth of cash and a printed map of your route. If traveling solo, check in with your Arequipa host before and after each day in the canyon.
Last practical note: accept trade-offs. Carrying more water increases comfort but slows you down; hiring a porter reduces weight but reduces autonomy.
lan honestly for your fitness and preferences. For me, a 2-day Sangalle descent with a light porter, broken-in boots, a 20,000 mAh power bank, and binoculars produced one of the most vivid travel memories I’ve had—the condor rolls above, the hot springs steam in the afternoon, and the comfort of clean socks at camp felt like luxury. Pack smart, respect the canyon, and you’ll leave with stories, photos, and the satisfaction that you prepared well.