Backpacking Essentials List: Most Complete Guide
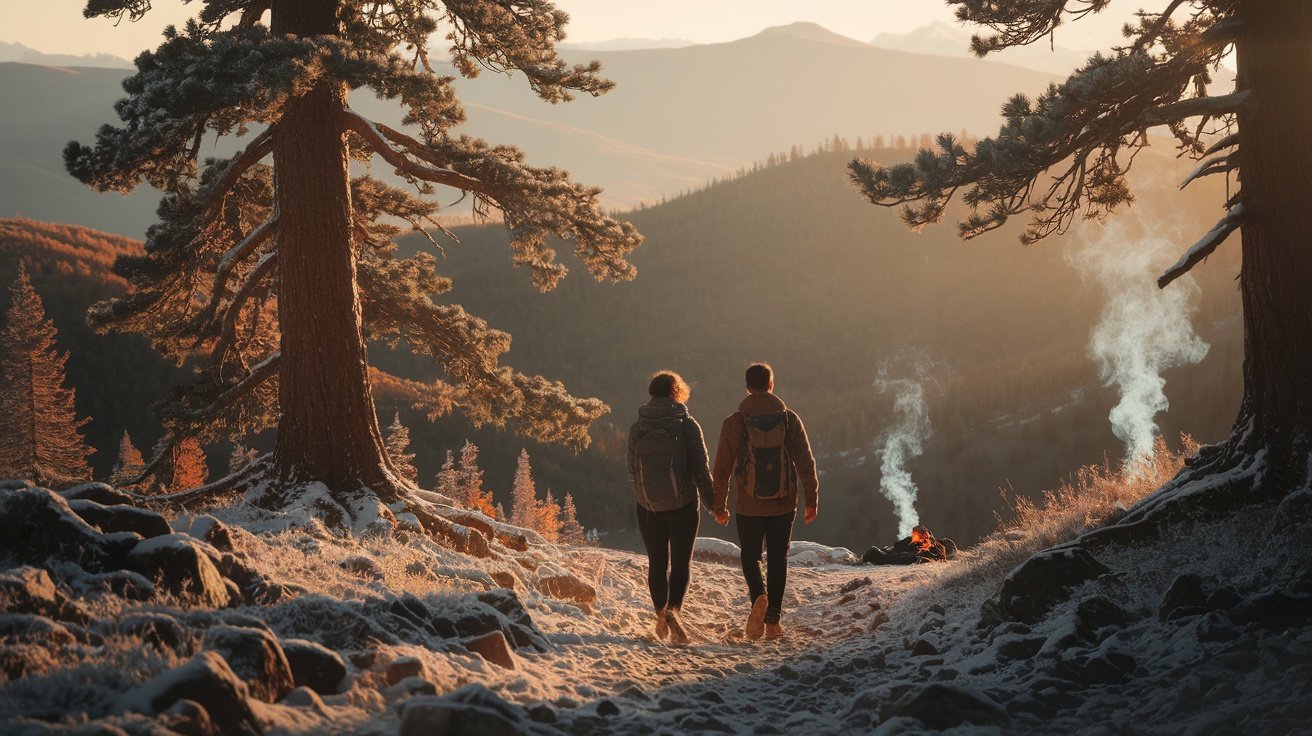
You’ve been scrolling through breathtaking trail photos for months. You’ve bookmarked that epic three-day loop through the mountains. Now you’re staring at your bedroom floor, surrounded by gear, wondering: “Do I actually need all this stuff?”
Here’s the truth: the difference between an unforgettable adventure and a miserable survival situation often comes down to what’s in your pack. Too little, and you’re risking your safety. Too much, and you’ll be cursing every extra pound by mile two.
I’ve learned this the hard way—carrying a cast-iron skillet on my first trip (seriously, what was I thinking?) and forgetting a headlamp on another. After years of trial and error, I’ve distilled backpacking gear into three categories: the absolute non-negotiables, the items that earn their weight, and the stuff you should leave at home.
This guide covers everything you need to know. We’ll start with the Ten Essentials that could save your life, move through the “Big Three” gear decisions that define your comfort level, and end with the small items that transform a good trip into a great one. Whether you’re planning your first overnight or your fiftieth, this checklist will help you pack smarter, hike lighter, and adventure safer.
The Ten Essentials: Your Non-Negotiable Foundation
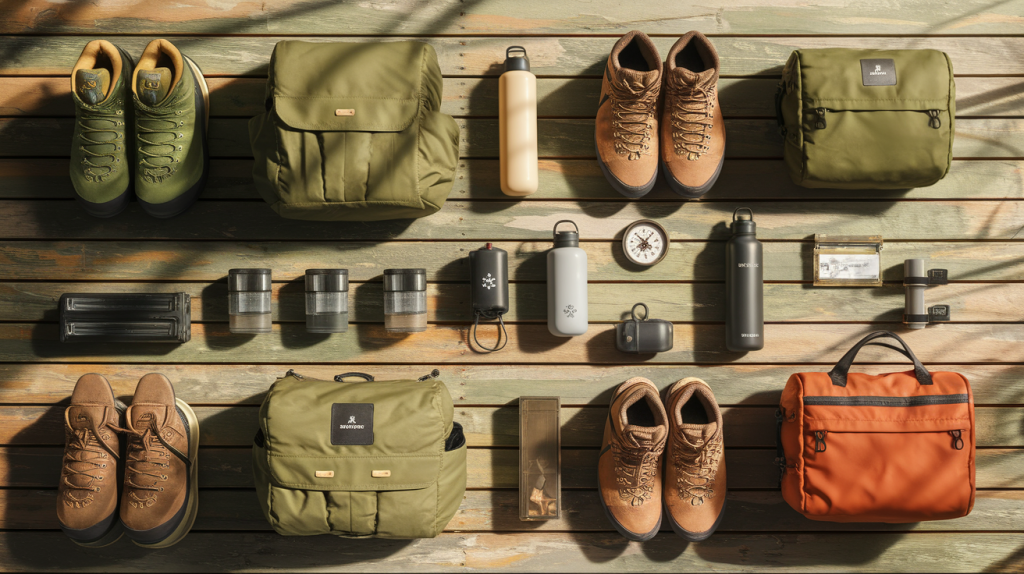
The Ten Essentials aren’t suggestions—they’re the baseline for survival in the backcountry. Originally developed by The Mountaineers in the 1930s, this system has evolved from a list of items to a system of functional categories. Every single one of these belongs in your pack, regardless of whether you’re doing an easy overnight or a challenging week-long trek.
Navigation Tools
Getting lost in the wilderness isn’t romantic—it’s dangerous. Your phone’s GPS is convenient, but batteries die, screens crack, and signal disappears. Always carry a physical map of your area and a compass you actually know how to use. Before your trip, download offline maps to your smartphone using apps like Gaia GPS, AllTrails, or CalTopo. These apps work without cell service and provide detailed topographic information.
Here’s the reality: most people get lost because they didn’t pay attention, not because they lacked tools. Study your route before you leave. Identify landmarks, water sources, and bailout points. Know where you’re going, and you’ll rarely need emergency navigation.
Sun Protection and First Aid
The sun at elevation is brutal. I’ve watched tough hikers reduced to tears by severe sunburn on day one of a five-day trip. Pack SPF 30+ sunscreen and reapply it every two hours. Bring sunglasses with UV protection and a wide-brimmed hat or buff. Your future skin will thank you.
Your first aid kit doesn’t need to be elaborate, but it needs to cover the common trail injuries: blisters, cuts, sprains, and insect bites. Include moleskin or blister bandages (you’ll use these), athletic tape, gauze pads, antiseptic wipes, pain relievers, antihistamines, and any personal medications. Add tweezers for splinters and a small emergency guide if you’re new to wilderness first aid. The entire kit should weigh less than a pound.
Fire, Light, and Emergency Shelter
Fire-starting capability is essential even if you never plan to build a campfire. Waterproof matches, a lighter, and fire starter cubes or petroleum jelly-soaked cotton balls give you redundancy. Store them in a waterproof container because wet matches are useless.
Your headlamp is your lifeline after sunset. Choose one with at least 200 lumens and bring extra batteries—they’re lightweight insurance. Pack a backup light source like a small flashlight or even a glow stick. Trust me, fumbling around a dark campsite looking for your tent stakes is no fun.
An emergency bivy or space blanket weighs just a few ounces but could save your life if you’re injured, lost, or caught in unexpected weather. These aren’t comfortable shelters—they’re survival tools that reflect body heat and provide windproof protection.
Nutrition, Hydration, and Tools
Always pack one extra day of food beyond your planned trip length. If you get lost or injured, those extra calories become critical. High-energy, non-perishable options like energy bars, nuts, and dried fruit work perfectly.
Water treatment is non-negotiable. You cannot safely drink untreated backcountry water, no matter how pristine it looks. Giardia and other waterborne pathogens are invisible and miserable. Carry a filter (like a Sawyer Squeeze), a UV purifier (like a SteriPEN), or purification tablets. Filters are my preference—they’re reliable, don’t require batteries, and remove sediment.
A quality multi-tool or fixed-blade knife handles countless tasks: food prep, gear repair, first aid, and emergency situations. Add duct tape wrapped around your trekking poles and a basic repair kit with safety pins, zip ties, and tenacious tape for quick fixes.
The Big Three: Shelter, Sleep, and Backpack Systems
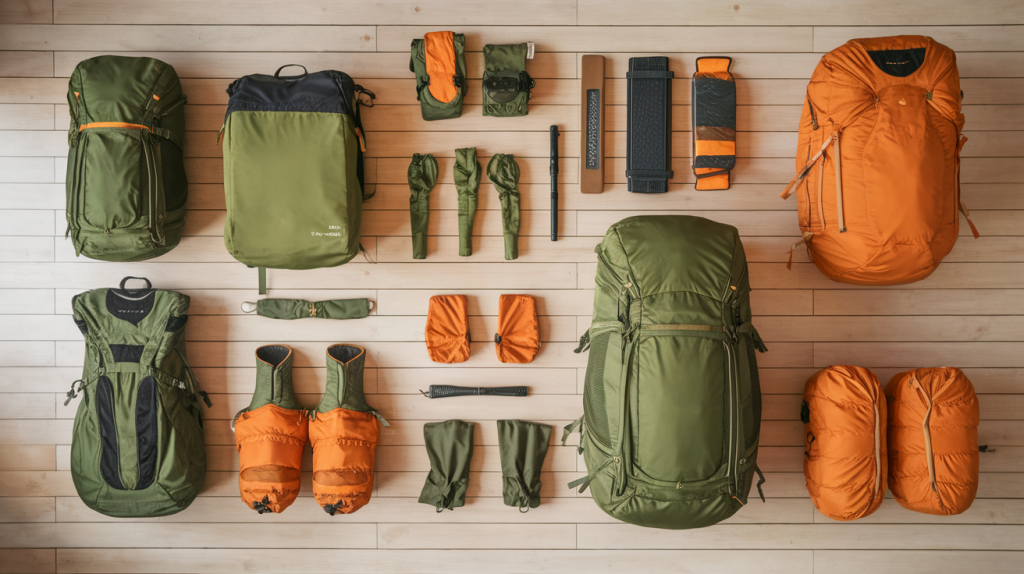
Your shelter, sleep system, and backpack—collectively called the “Big Three”—account for the majority of your pack weight. Investing time in these decisions pays massive dividends in comfort and performance on the trail.
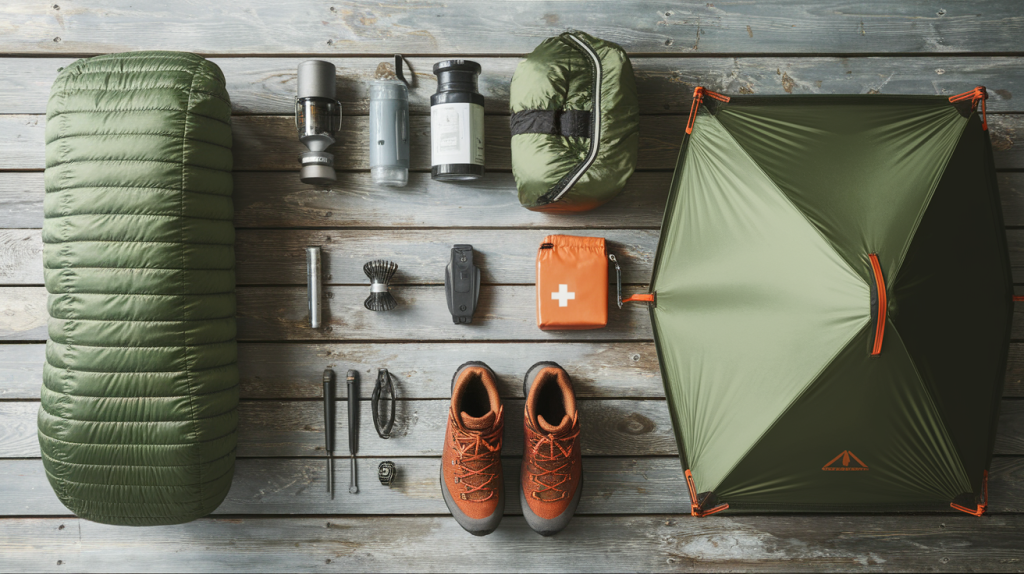
Shelter Solutions for Every Season
Tents, hammocks, and tarps each have devoted followers, and for good reason. Tents offer all-around protection, bug-free sleeping, and work in any terrain. For beginners, a two-person freestanding tent (even if you’re solo) provides extra space for gear and easier setup. Look for something in the 3-4 pound range with a full rainfly and good ventilation.
Hammocks create an incredibly comfortable sleep and work brilliantly in rocky or uneven terrain where pitching a tent is challenging. The downsides? You need trees (obviously), and staying warm requires an underquilt or insulated pad since cold air circulates beneath you. They’re fantastic for summer trips but require more skill for cold-weather camping.
Tarps are the ultralight choice for experienced backpackers willing to sacrifice bug protection and privacy for minimal weight. They require practice to pitch properly and offer less weather protection than enclosed shelters.
Whatever shelter you choose, don’t skip the footprint—a protective groundsheet that extends your tent’s life and keeps moisture out. Bring extra stakes beyond what comes with your tent. The included stakes are often lightweight aluminum that bend easily. Add four to six sturdy stakes for rocky or hard-packed ground.
Sleep System That Actually Keeps You Warm
A cold night destroys morale faster than anything else. Your sleeping bag’s temperature rating indicates the lowest temperature at which an average sleeper will stay warm. Here’s the secret: those ratings are optimistic. If your bag is rated to 30°F, you’ll be comfortable around 40°F. For three-season backpacking (spring through fall), a 20°F bag handles most conditions.
Down insulation offers the best warmth-to-weight ratio and compresses smaller than synthetic options. The catch? Down loses insulating properties when wet. Synthetic bags are heavier and bulkier but maintain warmth in damp conditions and cost less. For beginners, synthetic makes sense—it’s more forgiving.
Your sleeping pad matters more than most people realize. That R-value number? It measures insulation from ground cold. For summer trips, R-values of 2-3 work fine. Three-season camping requires 3-5. The ground sucks heat from your body relentlessly, and no sleeping bag compensates for an inadequate pad.
As for pillows—I consider them essential comfort, not luxury. A small inflatable pillow weighs 2-3 ounces and dramatically improves sleep quality. You can also stuff extra clothes in a stuff sack, but dedicated pillows are worth it.
Choosing and Packing Your Backpack
Capacity matters, but fit matters more. A perfectly sized, properly fitted 50L pack carries better than an ill-fitting 70L pack. For weekend trips (1-3 nights), 40-50 liters handles everything. Extended adventures (4+ nights) typically require 60-70 liters, though ultralight packers manage with less.
Getting the fit right is essential. Backpacks should sit on your hips, not your shoulders. Your hip belt should rest on your iliac crest (the bony part of your hips), and shoulder straps should hug your shoulders without gaps. Visit an outdoor retailer and get professionally fitted—this isn’t something you want to guess.
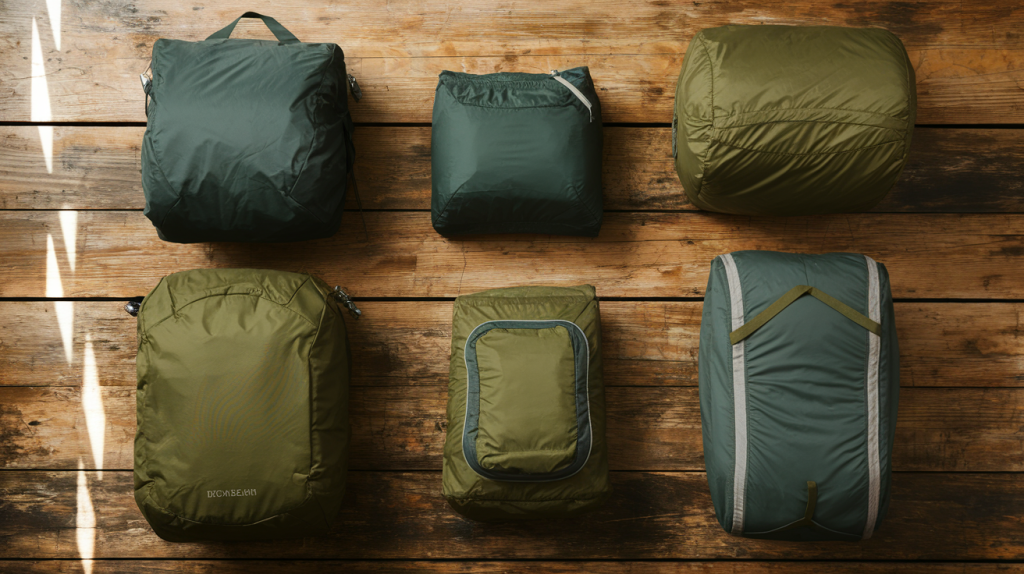
Organization transforms pack chaos into streamlined efficiency. Use stuff sacks to group similar items: one for clothes, one for kitchen gear, one for toiletries. Dry bags protect electronics and sleeping bags from moisture. Compression sacks reduce bulk for sleeping bags and puffy jackets.
Weight distribution follows a simple rule: heavy items (food, water, cook system) go close to your back between shoulder blades and hips. Light, bulky items (sleeping bag, extra clothes) go at the bottom. Medium-weight gear fills the remaining space. Frequently needed items (snacks, rain jacket, first aid) go in top lid pockets or outside mesh pockets.
Clothing and Footwear: Layering for Success
Clothing is where beginners make expensive mistakes. The goal isn’t fashion—it’s managing body temperature and moisture while minimizing weight. Master the layering system, and you’ll stay comfortable in wildly varying conditions.
The Three-Layer System Explained
Your base layer sits against your skin and manages moisture. Merino wool and synthetic fabrics wick sweat away from your body, keeping you dry and preventing that clammy, cold feeling. Cotton absorbs moisture and stays wet, which is why experienced backpackers say “cotton kills.” It’s not hyperbole—wet cotton provides zero insulation and causes hypothermia. Bring two sets of base layers: one for hiking, one for sleeping.
The insulation layer traps warm air and provides the bulk of your warmth. Fleece jackets are durable, dry quickly, and insulate even when damp. Down jackets offer incredible warmth-to-weight ratios and compress to nothing—perfect for camp and cold mornings. Synthetic puffy jackets cost less and handle moisture better than down. For most three-season trips, a mid-weight fleece or light puffy jacket covers your needs.
Your outer layer (shell) blocks wind and rain. A quality waterproof-breathable rain jacket is essential. Look for sealed seams, a hood that fits over a hat, and pit zips for ventilation. Rain pants complete the system—they’re annoying to carry until that first downpour, then they’re priceless.
Lower Body and Extremities
Hiking pants versus shorts is personal preference shaped by terrain and weather. I prefer convertible zip-off pants—versatility without extra weight. In buggy areas or thick brush, long pants protect your legs. On hot, exposed trails, shorts keep you cooler. Bring one or the other, not both.
Socks deserve serious attention because blisters ruin trips. Merino wool or synthetic hiking socks prevent blisters better than cotton. Bring 4-5 pairs for a week-long trip—it seems excessive until you appreciate starting each day with dry socks. Some hikers swear by liner socks under thicker hiking socks for blister prevention.
Gaiters keep debris, water, and snow out of your boots. They’re optional in summer but essential for muddy trails, stream crossings, and shoulder-season hiking. Lightweight gloves and a warm beanie belong in your pack year-round—mountain weather changes fast, and cold hands make simple tasks miserable.
Footwear That Goes the Distance
The trail shoe versus hiking boot debate rages on. Trail runners are lighter, break in faster, and dry quickly. They’re perfect for maintained trails and experienced hikers with strong ankles. Traditional boots provide ankle support, protection from rocks and roots, and durability for rough terrain. They’re heavier and require serious break-in time.
Breaking in boots before your trip is absolutely critical. Wear them around town, on day hikes, and during your daily routine. Blisters from new boots have ended more backpacking trips than I can count. Your feet swell during long hiking days, so try on boots in the afternoon with the socks you’ll actually wear.
Camp shoes are lightweight relief for tired feet. After hiking all day, your feet crave freedom. Lightweight sandals or slip-on shoes weigh 6-12 ounces and provide comfort around camp, protect your feet during water crossings, and serve as backup footwear if your primary shoes fail.
Kitchen, Hygiene, and Comfort Essentials
You’ve covered survival and shelter—now we’re into the gear that makes backpacking genuinely enjoyable. These items transform basic existence into actual living.
Backcountry Kitchen Setup
Your stove choice impacts weight, fuel availability, and cooking speed. Canister stoves (like the MSR PocketRocket) are beginner-friendly, lightweight, and easy to use. They screw onto pressurized fuel canisters and boil water in minutes. The downside? Canisters are harder to find in remote areas and perform poorly in freezing temperatures.
Liquid fuel stoves (like the MSR WhisperLite) run on white gas, which is available worldwide and works in any weather. They’re heavier, require priming, and need more maintenance. For most beginners, canister stoves make more sense.
Cookware minimalism is liberating. You need one pot (750ml-1L for solo trips), one insulated mug or bowl, and one spoon. That’s it. Titanium is lightest but expensive. Aluminum is affordable and conducts heat well. Skip the plates, extra utensils, and anything that doesn’t serve multiple purposes.
Food storage depends on bear activity in your area. Bear canisters are required in many national parks and protect your food from clever animals. They’re bulky and heavy but foolproof. Bear bags (hanging food from trees) work in areas without canister requirements but require proper technique. Never store food in your tent—it’s dangerous and damages the ecosystem.
Meal planning balances weight, nutrition, and morale. Dehydrated meals are convenient but expensive. Trail mix, jerky, energy bars, instant oatmeal, pasta, and instant rice create filling meals for less money. Calculate 2,500-4,500 calories per day depending on your size, pack weight, and terrain difficulty.
Hygiene and Sanitation Basics
Leave No Trace bathroom practices protect water sources and preserve wilderness for everyone. Pack a lightweight trowel for digging catholes 6-8 inches deep and 200 feet from water, trails, and camp. Bring toilet paper in a ziplock bag and pack out used TP (or use natural materials like smooth stones and leaves). Hand sanitizer is essential after bathroom breaks.
Biodegradable soap is fine for washing, but even “biodegradable” soap pollutes water sources. Wash dishes and yourself 200 feet from streams and lakes. A small quick-dry towel handles everything from dish drying to emergency first aid.
Minimize toiletries ruthlessly. A travel toothbrush, small toothpaste, and any prescription medications are essential. Everything else—deodorant, shampoo, body wash—is optional luxury. You’re going to smell like a hiker regardless. Embrace it.
Women’s hygiene on the trail requires planning. Pack out all used products in sealed bags. Menstrual cups are popular among backpackers because they’re reusable and create less waste. Whatever products you use, plan for your cycle and bring extras.
Small Comforts That Make a Big Difference
Trekking poles aren’t just for older hikers—they’re stability tools that save your knees on descents, help with stream crossings, and can support tarp shelters. They reduce impact on your joints and improve balance on uneven terrain. Adjustable poles collapse for easy packing.
Insect repellent with DEET or picaridin keeps mosquitoes and ticks at bay. In buggy areas, a head net weighs almost nothing and preserves your sanity. Some backpackers bring permethrin spray to treat clothing for long-lasting tick protection.
Downtime gear is personal. I always bring a small paperback book and a journal. Some people prefer playing cards, a harmonica, or simply enjoying conversations around camp. Photography enthusiasts bring cameras and extra batteries. These items don’t help you survive, but they make the experience richer.
Your smartphone (in airplane mode to save battery) serves multiple purposes: camera, GPS, emergency communication, e-reader, and journal. A small portable battery pack extends its usefulness. Just remember—you’re out there to disconnect, not scroll through social media.
Building Your Perfect Pack
You’ve reached the end of the essentials guide, but your adventure is just beginning. The gear in your pack determines whether you’ll reminisce about epic sunrises and breathtaking vistas or remember only aching shoulders and sleepless nights.
Start with the Ten Essentials—they’re non-negotiable regardless of trip length or difficulty. Navigation, sun protection, first aid, fire, light, emergency shelter, nutrition, hydration, and tools form your safety foundation. Everything else builds on that base.
Your first trip won’t be perfect, and that’s completely okay. You’ll discover you packed too much of something and not enough of something else. You’ll learn what gear works for your body and hiking style. This process of refinement is part of becoming a confident backpacker.
Print this checklist and customize it for your specific adventure. Consider your destination’s climate, terrain, and regulations. Check weather forecasts before you leave. Do a full “test pack” a week before departure to identify missing items while you still have time to acquire them.
Remember this truth: the best gear is the gear you’ll actually use and carry. Weight matters because every ounce accumulates over miles and days. But safety is non-negotiable—never sacrifice essential items to save a few ounces.
Start planning your epic backpacking adventure today. Choose a beginner-friendly trail for your first trip—something with moderate elevation gain, accessible water sources, and established campsites. Build your confidence and skills before tackling more challenging routes.
Share this guide with your hiking buddies so everyone’s prepared for the trail. The best backpacking trips happen when the entire group is properly equipped and ready for adventure.
Now I want to hear from you: What’s the one item you’d never leave behind? What gear mistakes have you made that taught you valuable lessons? Drop a comment below and share your backpacking wisdom with fellow adventurers. Your experience might save someone’s trip—or even their life.
The wild places are calling. You’ve got the knowledge. Now pack your bag and answer.

