9-Day Southwest Road Trip Itinerary
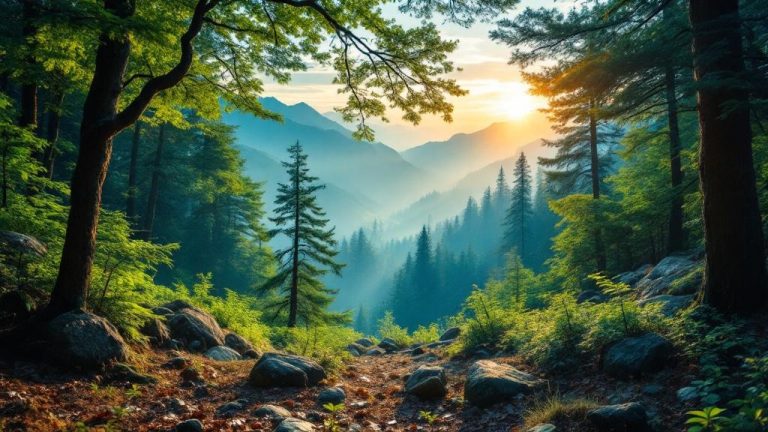
The Southwest delivers everything you dream about in an epic road trip—towering red rock canyons, otherworldly desert landscapes, and natural wonders that’ll leave you speechless.
I’ve spent years exploring this region, and this 9-day itinerary packs in the absolute best destinations without turning your vacation into an exhausting marathon.
You’ll experience five incredible national parks, witness sunrise over the Grand Canyon, photograph the famous light beams in Antelope Canyon, and hike among Bryce Canyon’s fairy-tale hoodoos.
This isn’t just another generic road trip guide—it’s a proven route that balances driving time with exploration, giving you enough time to actually enjoy each destination instead of just checking boxes.
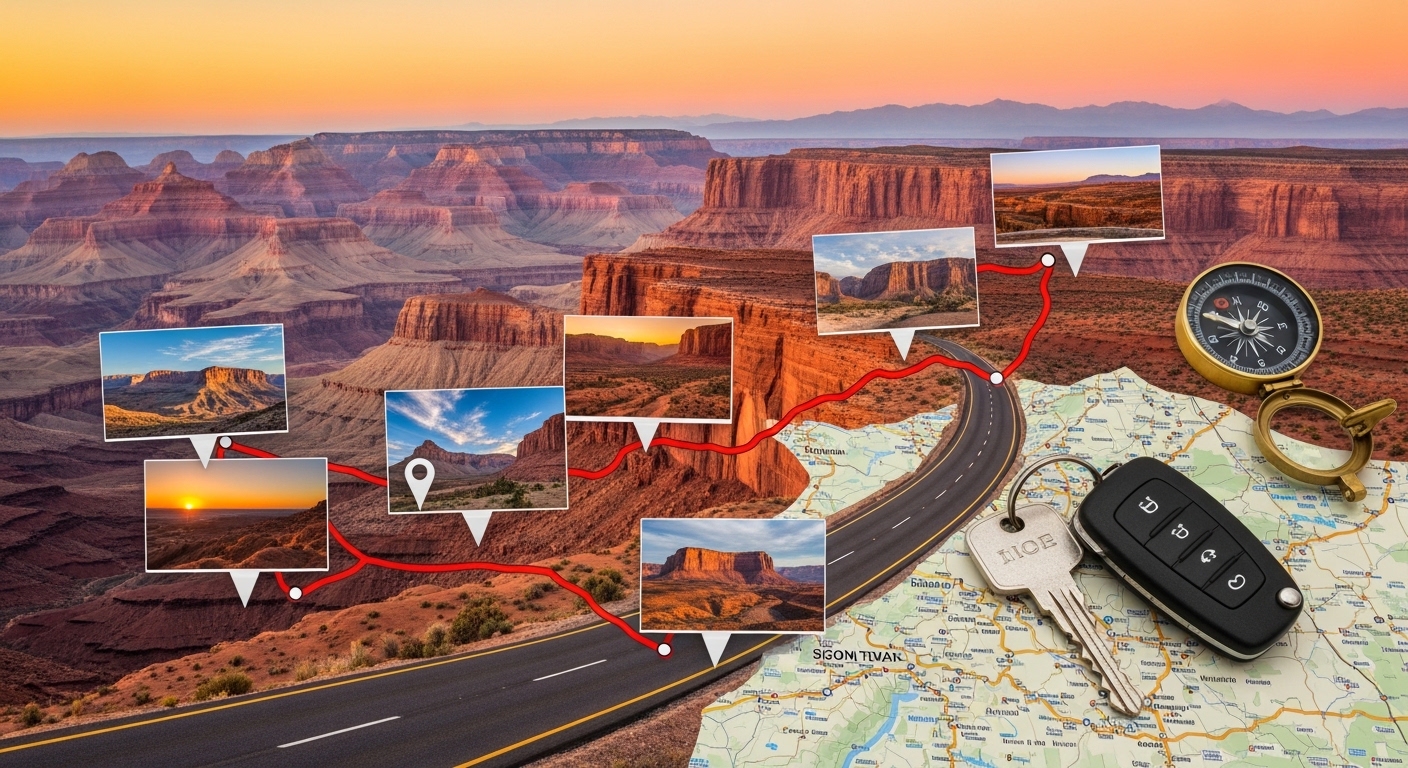
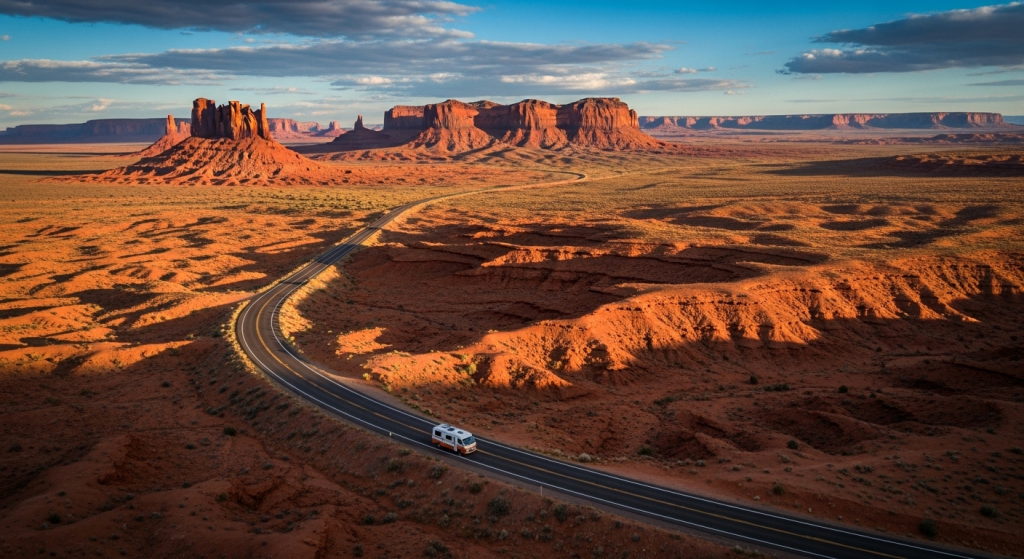
What makes this itinerary work? You’ll cover approximately 1,400 miles through Nevada, Utah, and Arizona, staying in comfortable gateway towns near each park.
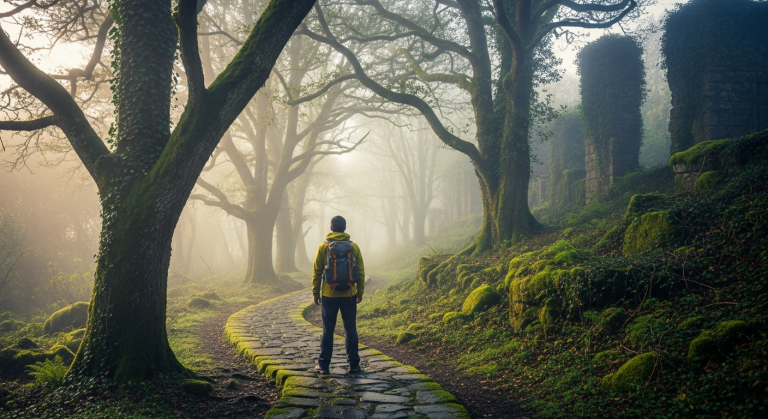
I’ve timed each day to avoid backtracking, included the essential stops everyone should see, and built in flexibility for your personal pace. Whether you’re an adventure seeker ready to tackle challenging hikes or prefer scenic drives and short walks, this route adapts to your style.
The best part? You don’t need months to plan this trip. Book your accommodations 2-3 months ahead, secure permits for popular trails early, and you’re set.
The Southwest’s magic happens year-round, though spring and fall offer the perfect combination of comfortable temperatures and manageable crowds. Let’s map out your adventure day by day.
Planning Your Perfect Southwest Adventure
Getting Started: Best Time to Visit and What to Pack
Spring (March through May) and fall (September through November) are absolutely the ideal seasons for this road trip. You’ll enjoy temperatures in the 60s-80s during the day, cool evenings perfect for campfires, and significantly fewer crowds than summer.
I’ve done this trip in both seasons, and fall edges ahead slightly—the aspens turn golden in higher elevations, and the light has this incredible warm quality that makes every photo stunning.
Winter offers unique beauty with snow-dusted red rocks and practically empty trails, but some high-elevation roads may close temporarily. Summer works if you start hikes at dawn and embrace the desert heat, though temperatures regularly exceed 100°F in lower elevations like the Grand Canyon’s inner gorge.
Your packing list makes or breaks this trip. Layer your clothing—I’m talking t-shirts, long sleeves, a fleece, and a light jacket. Desert temperatures swing 30-40 degrees between day and night.
Sturdy hiking shoes are non-negotiable (your feet will thank you after day three). Pack a wide-brimmed hat, quality sunscreen (the desert sun is relentless), and refillable water bottles for every person. Bring more water capacity than you think you need—dehydration sneaks up fast at these elevations.
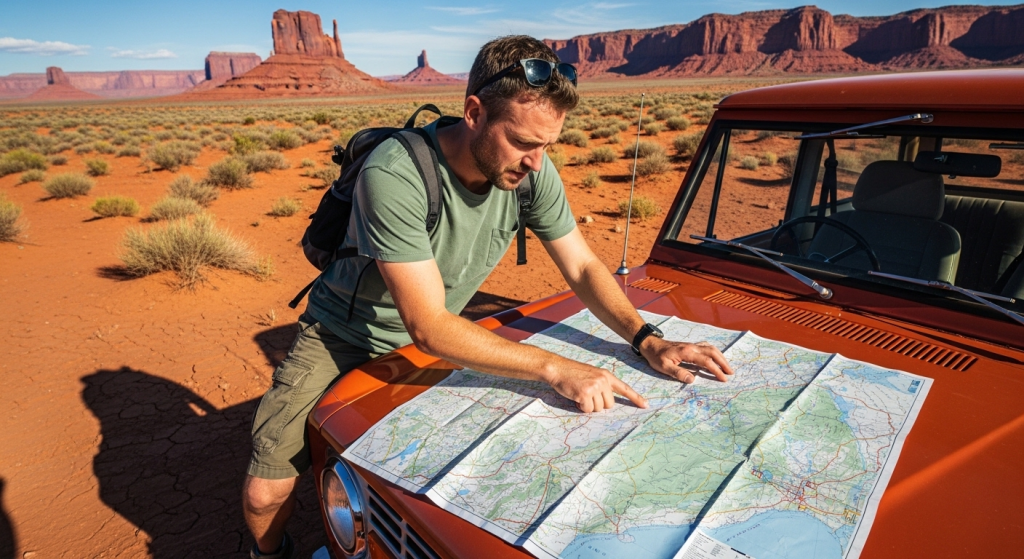
Don’t forget a physical map as backup. Cell service disappears completely in many areas, and GPS gets confused in slot canyons. I also recommend a good camera or smartphone with plenty of storage—you’ll take thousands of photos. A portable phone charger is essential since you’ll use your phone constantly for navigation and photography.
Start planning your timeline 2-3 months ahead. Book accommodations first, especially near Zion and Grand Canyon where options fill quickly. Reserve permits for Angels Landing in Zion immediately—these go fast. Antelope Canyon tours also need advance booking, particularly if you want the famous light beam times between 11am-1pm.
Route Overview and Logistics
Las Vegas makes the perfect starting point. Flights are affordable from most major cities, rental car options are plentiful and competitive, and you’re just 2.5 hours from your first national park. The entire loop covers roughly 1,400-1,600 miles depending on your specific detours and side trips.
Here’s your realistic budget breakdown for two people: expect $200-300 per day total. This includes mid-range accommodations ($100-150/night), meals ($60-80/day for two), gas ($40-50/day), and park entrance fees. The National Parks Annual Pass costs $80 and covers entrance to all the parks on this itinerary—it pays for itself by day three. Buy it at your first park entrance.
The driving days vary significantly. Your longest stretch is the final day returning to Las Vegas (about 4 hours), but most days involve 1.5-3 hours of driving, leaving plenty of time for exploration. I’ve structured this route to minimize backtracking—you’ll follow a logical loop that feels natural and efficient.
Rental car choice matters. A standard sedan works fine for this itinerary since all destinations are accessible via paved roads. However, a small SUV provides extra comfort for long drives and better handles dirt parking areas at trailheads. Skip the expensive 4WD upgrade unless you’re planning off-route adventures.
Booking Accommodations and Reservations
Your accommodation strategy should mix gateway towns with unique desert locations. Springdale (near Zion), Bryce Canyon City, Page (near Antelope Canyon), Tusayan (near Grand Canyon), and Sedona all offer excellent options ranging from budget motels to boutique hotels. I prefer staying in these small towns—they’re more affordable than lodges inside parks and offer better restaurant choices.
Book these specific items immediately: Angels Landing permits in Zion (lottery system opens three months ahead), Antelope Canyon guided tours (required—you cannot enter without a guide), and accommodations in Springdale and near Grand Canyon South Rim. Everything else offers more flexibility.
Keep one night flexible in your itinerary. Weather changes plans in the Southwest—thunderstorms close slot canyons, snow shuts down high-elevation roads, and sometimes you’ll discover a place you want to explore longer. Building in this buffer prevents stress when conditions shift.
Consider booking refundable rates when possible. The small upcharge provides peace of mind if you need to adjust your route. I’ve had to pivot due to unexpected park closures and weather, and refundable bookings saved those trips.
Days 1-3: Las Vegas to Zion National Park and Bryce Canyon

Day 1: Las Vegas to Zion via Valley of Fire
Pick up your rental car early—aim to leave Las Vegas by 8am. The drive to Zion takes about 2.5 hours direct, but you’re making an essential detour that adds just one hour and delivers incredible value.
Valley of Fire State Park sits 50 miles northeast of Las Vegas and showcases some of the Southwest’s most vivid red sandstone formations. The park name is accurate—the rocks literally look like they’re on fire when sunlight hits them. Stop at the visitor center for maps, then drive to the Fire Wave trailhead. This 1.5-mile roundtrip hike takes about an hour and features stunning striped rock formations in waves of red, pink, and white. Go early before it gets hot, and bring water.
After Valley of Fire, continue northeast toward Zion. You’ll pass through small desert towns and gradually watch the landscape transform from flat desert to dramatic canyon country. Stop for lunch in Mesquite or Hurricane—both offer quick food options and gas stations for topping off your tank.
Arrive in Springdale by mid-afternoon. This charming town sits right at Zion’s entrance and offers the perfect base for exploring the park. Check into your hotel, then spend the evening walking the town’s main street. Browse the outdoor shops, grab dinner at one of the local restaurants (Spotted Dog Café and Oscar’s Café both serve excellent food), and watch the canyon walls glow orange and red as the sun sets.
Tonight, prepare for tomorrow’s adventure. Fill your water bottles, pack snacks, check the weather forecast, and set an early alarm. Zion’s best experiences happen in the morning before crowds arrive and temperatures climb.
Day 2: Full Day Exploring Zion National Park
Start early—I mean really early. If you’re attempting Angels Landing (permit required), begin hiking by 6am to beat crowds and heat. This 5-mile roundtrip hike is Zion’s most famous trail, featuring steep switchbacks, dramatic drop-offs, and chains bolted into rock for the final half-mile. The views from the summit are absolutely worth the effort, but assess your fitness and fear of heights honestly before committing.
If Angels Landing feels too intense or you didn’t secure a permit, hike Observation Point via East Mesa Trail instead. This route offers equally spectacular views with less exposure and fewer crowds. The catch? You need to drive around to the east entrance, adding 1.5 hours round-trip driving time.
For a more relaxed morning, explore the Emerald Pools trails. The Lower Pool is an easy 1.2-mile walk suitable for all fitness levels, while the Upper Pool adds moderate climbing with waterfall views. These trails get crowded by 10am, so start early.
From March through November, Zion requires the free shuttle system for accessing the main canyon. Park at the visitor center, hop on the shuttle, and ride to various trailheads. The shuttle runs every 7-10 minutes and stops at all major points of interest. In winter, you can drive your personal vehicle through the canyon.
Afternoon activities depend on your morning energy expenditure. Take the Zion Canyon Scenic Drive (via shuttle or personal vehicle), stopping at Weeping Rock for a quick 0.5-mile walk to a cliff-side spring, the Temple of Sinawava for the easy Riverside Walk, or the Court of the Patriarchs viewpoint for photos of massive rock formations.
Return to Springdale for dinner and rest. Your legs will feel tomorrow’s hike at Bryce Canyon, so stretch and hydrate well tonight.
Day 3: Zion to Bryce Canyon National Park
Enjoy a more leisurely morning. Take a quick hike on the Pa’rus Trail, a paved 3.5-mile path that follows the Virgin River and offers beautiful canyon views without significant elevation gain. This trail welcomes bikes, strollers, and pets—the only trail in Zion that does.
Depart Zion by 10am for the scenic 1.5-hour drive to Bryce Canyon. The route takes you through long-range mountain views and transitions from red rock desert to ponderosa pine forests as you climb in elevation. Stop in Hatch for lunch—this tiny town offers basic restaurants and makes a good halfway point.
Bryce Canyon National Park sits at 8,000-9,000 feet elevation, so temperatures run 10-20 degrees cooler than Zion. Bring that jacket you packed. Enter the park and drive to Sunset Point first—this viewpoint offers your first stunning glimpse of the hoodoos, those otherworldly rock spires that make Bryce famous.
The Rim Trail connects all the main viewpoints and provides easy walking with spectacular views. Stroll from Sunset Point to Sunrise Point (0.5 miles), taking in the amphitheater from above. If you’re feeling energetic, continue to Inspiration Point and Bryce Point.
Catch sunset at Sunset Point (yes, it’s named perfectly). Arrive 30 minutes early to claim a good spot. The light transforms the orange and red hoodoos into something magical—this is one of those moments you’ll remember forever.
Stay in Bryce Canyon City or just outside the park entrance. Options are limited, so your advance booking pays off here. Tomorrow morning, you’re hiking into the hoodoos themselves.
Days 4-6: Antelope Canyon, Horseshoe Bend, and Grand Canyon
Day 4: Bryce to Page, Arizona
Wake up early for Bryce Canyon’s best hike: the Navajo Loop and Queen’s Garden combination trail. This 2.9-mile loop descends into the amphitheater, winds between towering hoodoos, and climbs back to the rim. Start at Sunset Point, descend the Navajo Loop (featuring the famous Wall Street section where the trail squeezes between 100-foot walls), connect to Queen’s Garden trail at the bottom, and return via Sunrise Point.
This hike takes 2-3 hours at a moderate pace. The elevation change is significant—you’ll descend and climb about 600 feet—but the trail is well-maintained and absolutely worth the effort. You’ll walk right among the hoodoos, touching these ancient rock formations and experiencing the park from a completely different perspective than the rim views.
Depart Bryce by noon for the 2.5-hour drive to Page, Arizona. This scenic route crosses through Grand Staircase-Escalante country, passing through small towns and vast desert landscapes. The drive itself is part of the adventure—keep your camera ready for spontaneous photo stops.
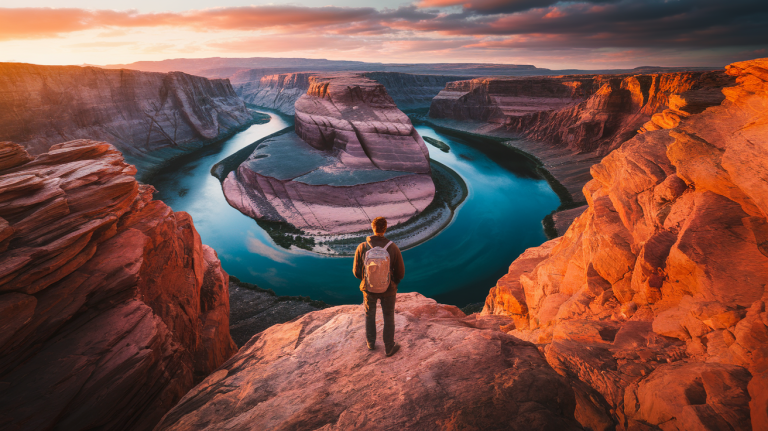
Arrive in Page by mid-afternoon and head straight to Horseshoe Bend. This iconic viewpoint sits just outside town and requires an easy 1.5-mile roundtrip walk from the parking area. The trail is sandy and exposed (no shade whatsoever), so bring water and go late afternoon when temperatures drop slightly.
Horseshoe Bend delivers one of the Southwest’s most photographed views—the Colorado River makes a perfect U-shaped bend around a massive rock formation, creating that classic image you’ve seen everywhere. The viewpoint sits at the edge of a 1,000-foot drop-off with no barriers, so watch your footing and keep kids close.
Spend the evening exploring Page, a small town that serves as the gateway to Lake Powell and Antelope Canyon. Grab dinner, review tomorrow’s tour time for Antelope Canyon, and rest up. Tomorrow brings one of the trip’s absolute highlights.
Day 5: Antelope Canyon and Lake Powell
Your Antelope Canyon tour is today’s centerpiece. You must book this guided tour in advance—no exceptions. The Navajo Nation owns this land, and access is restricted to guided tours only. Choose between Upper Antelope Canyon (easier access, ground-level entry, famous for light beams) and Lower Antelope Canyon (requires climbing ladders, more adventurous, less crowded).
I recommend Upper Antelope Canyon if you want the classic light beam experience. Book a tour between 11am-1pm when sunlight streams through the narrow opening and creates those ethereal beams you’ve seen in photos. Tours last about 90 minutes, and your guide will help you capture amazing photos while explaining the canyon’s geology and cultural significance.
Lower Antelope Canyon offers a more intimate experience with fewer people and slightly lower prices. The canyon is deeper and narrower, requiring several ladder climbs, but the formations are equally stunning. Light beams occur here too, though they’re less dramatic than Upper.
After your canyon tour, spend the afternoon at Lake Powell. This massive reservoir offers incredible blue waters surrounded by red sandstone cliffs. Rent a kayak from one of the marinas and paddle along the shoreline, or take a boat tour to see hidden slot canyons and remote beaches. The water stays cool year-round, but summer temperatures make swimming tempting.
Alternatively, use this afternoon for relaxation. This is your easiest day for driving (you’re staying in Page again tonight), so enjoy a leisurely pace. Visit the Glen Canyon Dam overlook, browse Page’s small downtown area, or simply rest at your hotel.
Tonight, enjoy a nice dinner and early bedtime. Tomorrow you’re heading to the Grand Canyon, and you’ll want energy for exploring one of the world’s most famous natural wonders.
Day 6: Page to Grand Canyon South Rim
Leave Page by 9am for the 2.5-hour drive to Grand Canyon National Park’s South Rim. The route takes you through the Navajo Nation and gradually climbs from desert lowlands to ponderosa pine forests at 7,000 feet elevation.
Enter the park through the East Entrance and stop immediately at Desert View Watchtower. This 70-foot stone tower, built in 1932, offers your first Grand Canyon view and provides excellent orientation to the park’s massive scale. Climb to the top for 360-degree views spanning dozens of miles.
Continue west along Desert View Drive, stopping at Lipan Point and Moran Point. Each viewpoint offers different perspectives of the canyon—the Colorado River far below, layered rock formations stretching to the horizon, and that overwhelming sense of scale that hits you repeatedly.
Arrive at Grand Canyon Village by early afternoon. Stop at the visitor center for maps and information, then explore the historic district. The El Tovar Hotel, built in 1905, is worth touring even if you’re not staying there. Grab lunch at one of the village restaurants.
Spend the afternoon driving or taking the free shuttle along Hermit Road (shuttle-only March through November). This 7-mile route stops at nine viewpoints, each offering unique perspectives. Don’t try to hit every single stop—choose three or four that appeal to you. Hopi Point is excellent for sunset, while The Abyss shows the canyon’s incredible depth.
Arrive at your sunset viewpoint 30-45 minutes early. Powell Point and Yavapai Point both offer spectacular sunset views with good crowd management. Watch the light change across the canyon as shadows deepen and colors shift from orange to red to purple. This moment—sitting at the rim of the Grand Canyon watching sunset—is worth the entire trip.
Stay in Tusayan (just outside the park entrance) or inside the park if you booked early enough. Tomorrow morning’s sunrise is equally stunning, so set that early alarm one more time.
Days 7-9: Sedona, Flagstaff, and Return to Las Vegas
Day 7: Grand Canyon to Sedona
Wake up for Grand Canyon sunrise—trust me on this. The light at dawn is completely different from sunset, with soft colors and often fog or clouds filling the canyon. Bundle up (it’s cold before sunrise at 7,000 feet), bring coffee, and claim your spot at Mather Point or Yavapai Point 20 minutes before sunrise.
After sunrise, hike a portion of the Rim Trail or venture partway down the Bright Angel Trail. The Rim Trail offers easy walking with continuous canyon views—walk as far as you want, then turn around. Bright Angel Trail descends into the canyon, and even hiking just to the first rest house (1.5 miles down, 1.5 miles back up) gives you that “into the canyon” experience. Don’t attempt hiking to the river and back in one day—that’s a dangerous mistake many visitors make.
Depart the Grand Canyon by late morning for the 2-hour drive to Sedona. The route descends from pine forests through Oak Creek Canyon, one of Arizona’s most scenic drives. Stop at the Oak Creek Canyon Overlook for photos, and consider a quick detour to Slide Rock State Park if you want to cool off in the creek.
Arrive in Sedona by early afternoon. This town is famous for its red rock formations, spiritual vortex sites, and upscale art galleries. Check into your hotel, then head out for an afternoon hike. Cathedral Rock is Sedona’s most iconic formation—the 1.5-mile hike is steep but short, delivering incredible views from the saddle between the rock spires.
For an easier option, hike around Bell Rock. This 3.6-mile loop circles the formation on mostly flat terrain, offering 360-degree views and photo opportunities from every angle. Bell Rock is also considered one of Sedona’s vortex sites, where some people report feeling increased energy (your mileage may vary).
Spend the evening exploring Sedona’s uptown area. Browse the art galleries, shop for souvenirs, and enjoy dinner at one of the many excellent restaurants. Sedona offers everything from casual cafes to fine dining, with prices reflecting the town’s upscale tourism focus.
Day 8: Full Day in Sedona and Flagstaff
Start your morning with Devil’s Bridge, Sedona’s largest natural sandstone arch. The trail is 4.2 miles roundtrip with moderate elevation gain, taking about 2-3 hours. The arch itself is impressive, and walking out onto it (if you’re comfortable with heights) provides incredible photo opportunities with red rocks stretching in every direction.
Alternatively, book a Pink Jeep Tour for a guided off-road adventure. These tours take you to areas you can’t reach in a standard vehicle, and the guides share fascinating information about Sedona’s geology, history, and ecology. It’s a great option if you’re hiked out or want a more relaxed morning.
After lunch in Sedona, drive 30 minutes north to Flagstaff. This charming mountain town sits at 7,000 feet elevation and offers a completely different vibe from desert destinations. The historic downtown features Route 66 heritage, independent bookstores, local coffee shops, and a thriving craft brewery scene.
Walk the downtown area, browsing shops like Bright Side Bookshop, Babbitt’s Backcountry Outfitters, and various art galleries. Stop for coffee at Late for the Train, a cozy café that locals love. The town has a college atmosphere (Northern Arizona University is here) mixed with outdoor recreation culture—everyone seems to have just come from hiking or is about to go hiking.
Spend the evening enjoying Flagstaff’s brewery scene. The town has earned a reputation for excellent craft beer, with Mother Road Brewing Company and Historic Brewing Company both offering great atmospheres and food. The mountain air and pine trees create a perfect setting for your final night before returning to Las Vegas.
Stay in Flagstaff tonight. Hotels here are affordable and plentiful, and you’re perfectly positioned for tomorrow’s drive back to Las Vegas.
Day 9: Return to Las Vegas
Enjoy a relaxed morning in Flagstaff. Grab breakfast at one of the local cafés, take a final walk through downtown, and depart by 9-10am. The drive back to Las Vegas takes about 4 hours direct, but you have options for breaking up the journey.
Consider stopping in Seligman, a quirky Route 66 town about 90 minutes from Flagstaff. This small town has preserved its historic Route 66 character with vintage signs, old motels, and classic diners. Walk the main street, snap photos of the retro signs, and grab lunch at Delgadillo’s Snow Cap, a Route 66 institution since 1953.
Another option is Hoover Dam, located 30 minutes from Las Vegas. This engineering marvel completed in 1935 still impresses with its massive concrete arch holding back Lake Mead. You can drive across the dam for free (security checkpoint required), or book a tour of the interior. The visitor center provides excellent historical context and stunning views from the observation deck.
Arrive in Las Vegas by mid-afternoon, allowing plenty of time to return your rental car, check bags if you’re flying out tonight, or check into a hotel if you’re spending one final night. If you have time, enjoy Las Vegas entertainment—catch a show, try your luck at the casinos, or simply enjoy a nice dinner celebrating your incredible Southwest adventure.
Making Your Southwest Road Trip Unforgettable
This 9-day itinerary delivers the Southwest’s absolute best destinations in a logical, manageable route. You’ll experience five stunning national parks, photograph iconic landscapes, hike among ancient rock formations, and create memories that last a lifetime. The route balances driving time with exploration, giving you enough time at each destination without feeling rushed.
Start planning now. Book your accommodations 2-3 months ahead, secure permits for Angels Landing and Antelope Canyon tours immediately, and purchase your National Parks Annual Pass at the first park entrance. Pack layers, bring plenty of water, and prepare for diverse terrain from desert lowlands to mountain forests.
The Southwest’s magic works on everyone who visits. These landscapes have inspired artists, photographers, and adventurers for generations, and now it’s your turn to experience them firsthand. Whether you’re watching light beams in Antelope Canyon, standing at the rim of the Grand Canyon, or hiking among Bryce’s hoodoos, you’ll understand why this region draws millions of visitors every year.
Ready to start your Southwest adventure? Pin this itinerary for easy reference while planning, share it with your travel companions, and start counting down the days until your road trip begins. The red rocks are waiting, and they’re even more spectacular than the photos suggest.
Safe travels, and enjoy every single mile of your Southwest journey!