10 Packing Mistakes to Avoid for International Trips
You’ve booked your dream international trip, and now you’re staring at an empty suitcase wondering how you’ll possibly fit everything you need. Sound familiar?
Packing for international travel feels overwhelming because the stakes are higher than domestic trips. You can’t just drive home if you forget something essential, and replacing items abroad can be expensive—or impossible. I’ve watched travelers pay $150 in overweight baggage fees, arrive without necessary medications, and spend their first vacation day shopping for phone chargers because they brought the wrong adapter.
These packing mistakes don’t just cost money. They steal your peace of mind and waste precious vacation time that you could spend exploring ancient ruins, savoring incredible food, or relaxing on pristine beaches.
Here’s the good news: every single one of these frustrations is completely avoidable.
This guide reveals the 10 most common packing mistakes that sabotage international trips—and more importantly, the simple strategies that prevent them. You’ll discover proven techniques that professional travelers use to pack efficiently, stay organized, and breeze through airports with confidence. No more panicking at security checkpoints. No more digging through chaotic suitcases in hotel rooms. No more “I wish I had brought that” regrets.
Whether you’re planning your first passport stamp or your fiftieth, these practical tips will transform packing from a stressful chore into a straightforward process. You’ll learn exactly what to bring, how to organize it, and which items you can safely leave at home. By the end of this article, you’ll pack like a seasoned globetrotter—stress-free and ready for adventure.
Let’s dive into the mistakes that trip up even experienced travelers, and the easy solutions that will change how you pack forever.
Pre-Packing Planning Mistakes That Set You Up for Failure

Mistake #1: Overpacking “Just in Case” Items
Not Researching Your Destination’s Climate and Culture

Mistake #2: Ignoring Airline and International Regulations
The biggest packing mistake happens before you even open your suitcase: skipping destination research. You can’t pack effectively if you don’t know what you’re packing for.
Weather assumptions will betray you. Many travelers pack based on general knowledge—”It’s summer in Europe, so I’ll bring shorts and tank tops”—only to discover that London averages 65°F in July with frequent rain, or that evenings in Barcelona require layers. I’ve seen tourists shivering through Icelandic “summer” in inadequate clothing because they didn’t research that temperatures rarely exceed 60°F.
Cultural dress codes matter even more. Some countries require modest clothing at religious sites, covering shoulders and knees. Others have specific expectations for business meetings or upscale restaurants. Showing up to a Bangkok temple in a tank top means you’ll either be denied entry or forced to rent an overpriced cover-up at the entrance.
Here’s your essential research checklist: Use weather apps like Weather Underground or AccuWeather to check historical data for your travel dates, not just current forecasts. Read recent travel forum posts on sites like TripAdvisor or Reddit to get real traveler perspectives on what to wear. Screenshot weather forecasts and save destination-specific packing lists to your phone for easy reference.
This simple research takes 15 minutes and prevents countless packing mistakes. You’ll know whether you need rain gear, warm layers, sun protection, or modest clothing—and you’ll pack accordingly.
Ignoring Your Airline’s Baggage Policies

Mistake #3: Failing to Prepare for Different Weather Conditions
Assuming all airlines follow the same baggage rules is an expensive mistake. International carriers have drastically different policies than domestic flights, and budget airlines impose even stricter limitations.
One traveler I know confidently showed up at the airport with the same bags she always uses for US flights—only to discover her international carrier allowed just 50 pounds instead of the domestic 70-pound limit. She paid $120 in overweight fees and had to repack at the check-in counter while frustrated passengers waited behind her.
Carry-on size restrictions vary wildly too. European budget airlines like Ryanair enforce smaller dimensions than American carriers, and some charge fees for any bag beyond a small personal item. Your standard carry-on that fits perfectly on Delta might be too large for your connecting flight on a regional carrier.
Here’s your effective solution: Visit your airline’s website 48 hours before departure and check the exact baggage policy for your specific route. International flights often have different rules than domestic ones, even on the same airline. Note weight limits, size restrictions, number of bags allowed, and prohibited items. Screenshot this information or print it out.
Don’t forget about your return flight. If you’re flying home on a different airline, check their policies too. Also research any connecting flights—your journey might involve three different carriers with three different baggage rules.
This quick verification prevents surprise fees, repacking stress, and the nightmare of leaving belongings behind because they don’t fit airline requirements.
Packing Without a Strategic List

Mistake #4: Not Organizing Your Luggage Properly
Packing from memory guarantees you’ll forget something important. Your brain simply can’t track dozens of items while managing all the other trip details competing for your attention.
The proven power of a complete packing checklist cannot be overstated. Professional travelers never pack without one because lists eliminate guesswork, reduce stress, and ensure nothing essential gets left behind. You’ll pack faster, more efficiently, and with complete confidence that you have everything you need.
Create your ultimate packing list by organizing items into clear categories: documents (passport, visas, travel insurance, copies), clothing (categorized by type and activity), toiletries (separated into carry-on and checked items), electronics (devices, chargers, adapters), and medications (prescriptions, over-the-counter essentials, first aid).
Start your list three weeks before departure and refine it as you think of items. Keep a running note on your phone where you can add things as they occur to you. Review the list multiple times, imagining yourself going through a typical day at your destination—what will you actually need?
Base your list on trip length and planned activities. A beach vacation requires completely different items than a city exploration trip or mountain hiking adventure. Be specific: don’t just write “shoes,” write “comfortable walking shoes for cobblestone streets, dressy flats for restaurants, flip-flops for hotel.”
This strategic approach transforms packing from a chaotic scramble into an organized process. You’ll never again arrive at your destination and realize you forgot something crucial.
Clothing and Luggage Mistakes That Create Travel Nightmares

Mistake #5: Leaving Important Documents and Copies Behind
Overpacking “Just in Case” Outfits

Mistake #6: Packing Valuables in Checked Luggage
“What if I need this?” is the question that leads to overflowing suitcases and expensive baggage fees. Bringing your entire wardrobe because you might need options guarantees luggage stress and regret.
The reality check: you won’t wear most of what you pack. Studies show travelers wear only 60% of the clothing they bring on trips. Those “just in case” outfits stay folded in your suitcase while you wear the same comfortable favorites repeatedly.
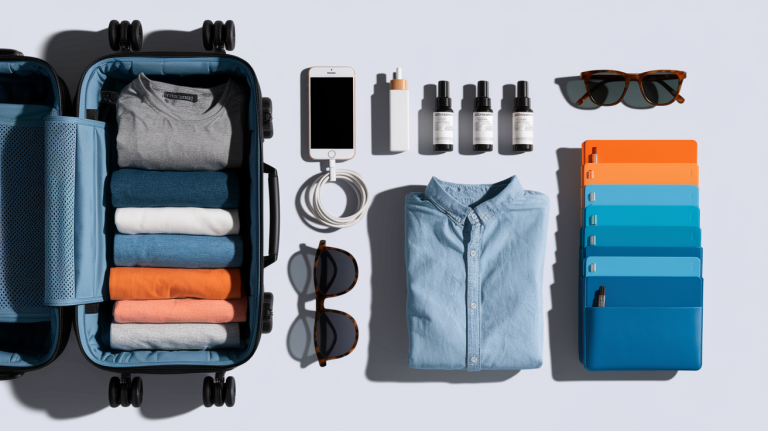
The perfect solution is the capsule wardrobe approach: carefully selected mix-and-match pieces in coordinating colors. Choose a color scheme—like navy, white, and tan—and select items that work together in multiple combinations. Five tops that coordinate with four bottoms create 20 different outfits.
Try the amazing 5-4-3-2-1 packing method that experienced travelers swear by: 5 tops (mix of t-shirts, blouses, and layering pieces), 4 bottoms (combination of pants, shorts, or skirts), 3 accessories (scarves, belts, or jewelry to change up looks), 2 pairs of shoes (one for walking, one dressier option), and 1 jacket or cardigan for layers.
This formula works for trips up to two weeks because you can wear items multiple times in different combinations. Nobody at your destination knows you packed light—they just see you looking put-together in various outfits.
Choose versatile pieces that dress up or down. A simple black dress works for sightseeing with sneakers or dinner with heels. Dark jeans transition from day activities to evening restaurants. Neutral colors hide travel wear better than light fabrics.
Remember: you can do laundry abroad. Most hotels offer laundry service, and many destinations have affordable laundromats. Packing for 4-5 days of outfits is sufficient even for longer trips.
Forgetting to Leave Room for Souvenirs

Mistake #7: Not Considering Cultural Dress Codes
Picture this scenario: You’ve had an incredible trip, found perfect gifts for everyone back home, and discovered items you absolutely must bring back. Then you realize your suitcase is completely full. Now you’re facing the choice between leaving purchases behind, paying for an extra bag, or desperately trying to squeeze everything in and hoping your zipper holds.
This common mistake forces thousands of travelers to buy additional luggage on return trips. Airport shops know this—that’s why they sell overpriced duffel bags to desperate travelers at departure gates.
The effective strategy is simple: pack your suitcase only 75% full before departure. That empty space is your souvenir allowance. It sounds counterintuitive when you’re worried about forgetting items, but this buffer prevents return-trip stress and unexpected expenses.
Use the “squeeze test” before leaving home. If your suitcase is packed so tightly that you’re sitting on it to zip it closed, you’ve overpacked. You should be able to close your luggage easily with room for items to shift during travel.
Here’s a quick hack that savvy travelers use: bring a foldable duffel bag or lightweight tote in your checked luggage. These pack flat and weigh almost nothing, but they give you overflow capacity on your return trip. If you don’t need it, it stays folded in your suitcase. If you do need it, you have an extra bag ready without paying airport prices.
Consider shipping items home if you go overboard with purchases. Many countries offer reliable postal services that cost less than airline baggage fees. Calculate the shipping cost versus the fee for an additional checked bag—you might be surprised which option saves money.
Not Using Packing Cubes or Organizers

Mistake #8: Forgetting About the Return Trip
Throwing everything loose into your suitcase creates a chaotic mess that wastes space and makes finding items impossible. You’ll spend vacation time digging through tangled clothes searching for that one shirt you need.
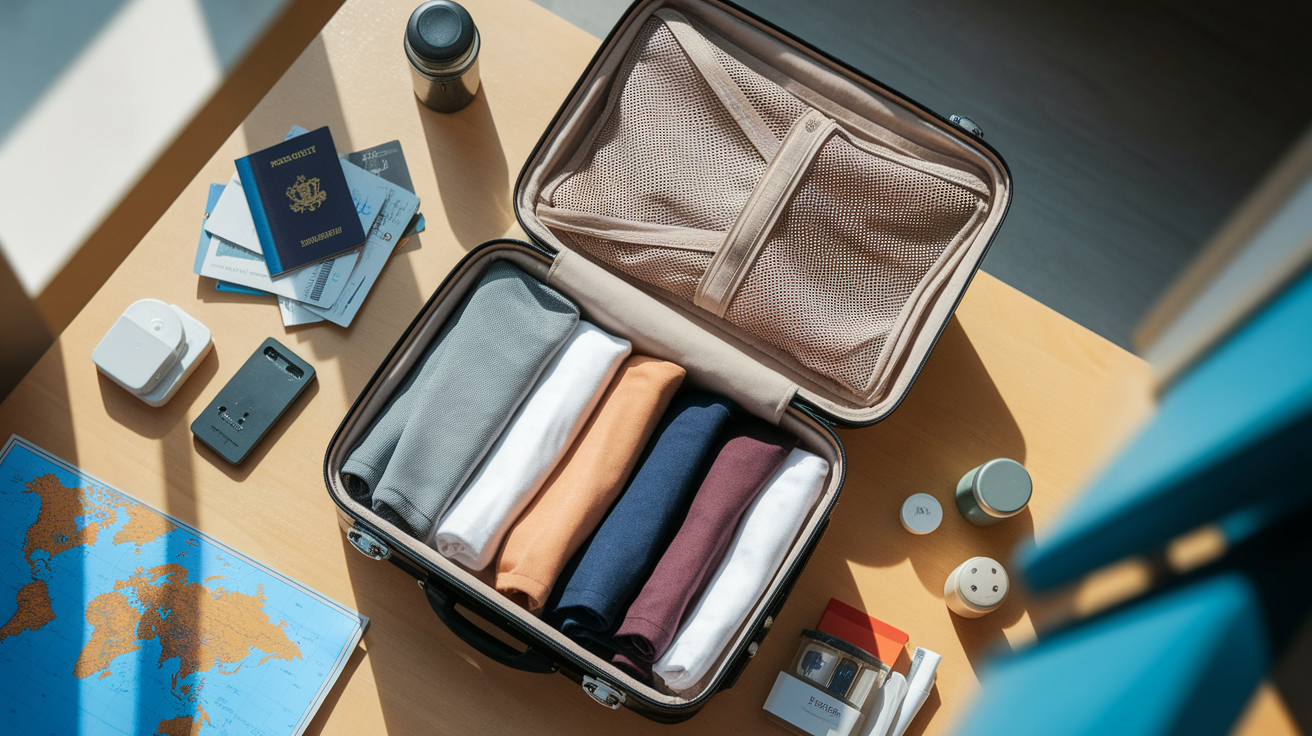
Packing cubes transform your suitcase into an organized system. These simple fabric containers revolutionize how you pack, and travelers who try them never go back to the old way.
The benefits are remarkable: you maximize space because cubes compress clothing and eliminate gaps, minimize wrinkles by keeping items neatly contained, and find things instantly because everything has a designated place. No more unpacking your entire suitcase to locate one item.
Compression cubes take this further by squeezing air out of clothing, creating even more space. You can fit 30-40% more in your luggage using compression cubes versus loose packing. This means the difference between carry-on only or needing to check a bag.
Organize by category: one cube for tops, another for bottoms, a third for underwear and socks. Or organize by outfit if you prefer. Some travelers use different colored cubes for different types of items—red for dirty laundry, blue for clean clothes.
Essential organizers beyond packing cubes include shoe bags (protecting clean clothes from dirty soles), electronics pouches (keeping chargers and cables untangled), and toiletry bags (preventing spills from ruining clothing). A dedicated laundry bag keeps worn items separate from clean ones.
The investment is minimal—quality packing cubes cost $20-40 for a set—but the organizational benefit lasts for years of travel. This is the single most effective upgrade you can make to your packing system.
Wearing the Wrong Shoes for Travel Days
Your shoe choice for long international flights and airport navigation directly impacts your comfort level for hours. Uncomfortable shoes turn travel days into painful ordeals of swollen feet, blisters, and regret.
I’ve watched travelers hobble through massive international airports in brand-new shoes or fashion-forward footwear that looks great but feels terrible. By the time they reach their destination, their feet are destroyed and they’ve ruined the first days of vacation recovering.
The proven travel shoe checklist includes three essential pairs: comfortable walking shoes for daily sightseeing (broken in, supportive, appropriate for your destination’s terrain), one dressier option for nice restaurants or events (still comfortable, just more polished), and easy slip-on shoes for airport security (crucial for international travel where you’ll remove shoes multiple times).
Your airport shoes need specific qualities: slip-on design for quick security removal, comfortable for hours of wear, supportive enough for long terminal walks, and appropriate for your destination climate. Canvas slip-ons, comfortable loafers, or supportive sandals (depending on weather) all work perfectly.
Never wear new shoes for travel. Break them in thoroughly at home first, wearing them for full days to ensure they don’t cause blisters or discomfort. Your feet swell during flights, so shoes that fit perfectly on the ground might feel tight at cruising altitude.
Here’s a smart packing tip that frequent flyers use: wear your bulkiest shoes on the plane to save luggage space. Hiking boots or sneakers take up significant suitcase room but don’t count toward baggage weight when you’re wearing them. Pack your lighter shoes in your luggage instead.
Consider compression socks for long international flights. They improve circulation, reduce swelling, and make the journey more comfortable—especially important for flights over six hours.
Documentation and Electronics Blunders That Cause Major Headaches
Not Making Copies of Critical Documents
Losing your passport in a foreign country without backup documentation creates a nightmare scenario that can derail your entire trip. You’ll spend days at embassies instead of exploring your destination, and emergency passport replacement is expensive and stressful.
This disaster is completely preventable with simple preparation. The easy protection plan involves creating both physical and digital copies of every critical document before departure.
Make photocopies of your passport photo page, visa stamps, travel insurance policy, prescription medications (including generic drug names), emergency contacts, and credit cards (front and back). Keep these physical copies in your checked luggage, separate from the originals you carry. If something happens to your carry-on, you have backup documentation in your suitcase.
Digital copies provide additional security. Scan or photograph these same documents and save them to cloud storage like Google Drive, Dropbox, or iCloud. Email copies to yourself and a trusted person back home. This ensures you can access critical information from any internet-connected device, anywhere in the world.
Store originals and copies separately. Never keep your passport copy in the same bag as your actual passport—that defeats the purpose. Keep originals in a hotel safe when you don’t need them for the day, and carry copies for activities where you might need identification but don’t want to risk losing the real document.
Include your travel itinerary, hotel confirmations, and flight details in your digital backup folder. If your phone dies or gets stolen, you can still access reservation numbers and contact information from any computer.
Take this preparation seriously. The 20 minutes you spend creating copies before your trip could save you days of stress and hundreds of dollars in emergency fees if disaster strikes.
Bringing the Wrong Power Adapters and Converters
Arriving at your destination only to discover you can’t charge your phone or use your devices is frustrating and easily avoidable. Yet this mistake trips up countless travelers who confuse adapters with converters or simply don’t research their destination’s electrical standards.
Understanding the difference is essential: adapters change the plug shape to fit foreign outlets, while converters change the voltage. Most modern electronics (phones, laptops, cameras) are dual-voltage and only need adapters. Older devices like hair dryers or curling irons might need converters, or you risk frying them.
Check your device labels before packing. Look for “INPUT: 100-240V” which means it’s dual-voltage and only needs an adapter. If it says “INPUT: 120V,” it needs a converter for countries with 220V electricity (most of Europe, Asia, and Africa).
Research your destination’s electrical standards before packing. Different countries use different plug types—Europe uses Type C and F, the UK uses Type G, and outlets in Asia vary by country. Some destinations use multiple plug types, so verify the specific standard for where you’re staying.
The simple solution is investing in a quality universal adapter that works in multiple countries. These cost $15-30 and cover most worldwide plug configurations. Buy one with built-in USB ports to charge multiple devices simultaneously without needing multiple adapters.
Your ultimate electronics packing kit includes: universal adapter, portable power bank (essential for long sightseeing days), charging cables for all devices, and a power strip if you’re traveling with multiple electronics. A power strip lets you plug multiple devices into one adapter, maximizing your charging capacity.
Avoid buying cheap adapters at airport kiosks—they’re overpriced and often poor quality. Purchase reliable adapters before your trip from electronics stores or online retailers.
Forgetting to Notify Your Bank and Phone Carrier
Picture this: You’re trying to pay for dinner in Paris when your credit card gets declined. You call your bank only to discover they’ve frozen your account due to “suspicious foreign activity.” Meanwhile, your phone bill is racking up hundreds of dollars in international roaming charges because you forgot to adjust your plan.
These oversights lead to frozen cards and massive phone bills that ruin travel budgets. Banks use fraud detection systems that flag unusual spending patterns, and foreign transactions definitely qualify as unusual. Without advance notice, your cards get blocked for your protection—leaving you stranded without access to funds.
Your quick pre-trip checklist starts with calling every bank and credit card company three to five days before departure. Provide your travel dates and destinations so they can note your account. This simple call prevents fraud blocks and ensures your cards work when you need them.
Activate international phone plans with your carrier or consider alternatives. Most carriers offer temporary international packages that cost $10-15 per day, significantly cheaper than standard roaming rates. Some provide monthly international plans if you travel frequently.
Better yet, use local SIM cards at your destination or rely on WiFi with messaging apps like WhatsApp, which work internationally without charges. Download offline maps (Google Maps allows this) before leaving so you can navigate without data.
The effective backup strategy involves bringing two different credit cards from different banks and storing them separately. If one gets blocked or lost, you have immediate access to funds from the other. Notify both banks of your travel plans.
Write down international contact numbers for your banks and store them separately from your cards. The customer service number on the back of your card won’t help if the card is lost or stolen—you need the international support number.
This preparation takes 30 minutes but prevents financial disasters that could strand you abroad without access to money or communication.
Toiletries and Medication Mishaps That Ruin Your First Days Abroad
Packing Full-Size Toiletries in Carry-On Luggage
The TSA liquid rules catch even experienced travelers off-guard when they’re rushing through security. Watching security agents confiscate your expensive full-size products because they exceed liquid limits is frustrating—and completely avoidable.
The proven 3-1-1 rule governs carry-on liquids for international flights: containers must be 3.4 ounces (100ml) or less, all containers must fit in 1 quart-sized clear plastic bag, and each passenger gets 1 bag. This applies to liquids, gels, creams, and aerosols including shampoo, conditioner, toothpaste, makeup, and sunscreen.
Many travelers underestimate what counts as liquid. Mascara, lip gloss, peanut butter, and even snow globes fall under liquid restrictions. If you can pour, pump, squeeze, spray, or spread it, it’s probably a liquid.
The amazing space-saver solution: buy toiletries at your destination instead of packing them. Most international cities have pharmacies, supermarkets, or convenience stores where you can purchase basics immediately after arrival. This frees up luggage space and eliminates security hassles.
Alternatively, use hotel amenities. Most hotels provide shampoo, conditioner, soap, and lotion. Higher-end properties offer quality products that work perfectly fine for your trip. Call ahead to confirm what’s provided so you know what to pack.
If you must bring specific products, transfer them into travel-size containers (available at any drugstore) and pack them in your checked luggage where liquid restrictions don’t apply. Keep only essentials in your carry-on 3-1-1 bag.
Solid alternatives bypass liquid rules entirely. Shampoo bars, solid deodorant, bar soap, and powder toothpaste don’t count as liquids. These products save space, prevent spills, and breeze through security.
Remember that duty-free liquids purchased after security must remain sealed in their special bags until you reach your final destination. If you have connecting flights, those liquids might get confiscated at your next security checkpoint depending on the country’s rules.
Not Packing Medications in Their Original Containers
Throwing loose pills into a weekly pill organizer seems convenient, but this common practice creates serious customs issues that can land you in legal trouble abroad.
Customs officials in many countries require medications in original prescription bottles with your name, the prescribing doctor, and pharmacy information clearly labeled. Unlabeled pills raise immediate red flags. Officials can’t verify what the medication is, whether it’s legal in their country, or if it’s actually prescribed to you.
Some countries have strict regulations about specific medications. Drugs that are perfectly legal in your home country might be controlled substances elsewhere. Adderall, for example, is banned in Japan. Codeine-based pain relievers are prohibited in several Middle Eastern countries. Arriving with these medications—even with prescriptions—can result in confiscation, fines, or arrest.
Essential medication packing rules include: keep everything in original bottles with labels intact, bring a letter from your doctor on official letterhead explaining your medical conditions and necessary medications, and know the generic drug names (important because brand names differ internationally).
Pack your complete medication supply in your carry-on luggage, never in checked bags. Airlines lose luggage regularly, and you cannot afford to be without essential medications while your bag gets located. Carry-on ensures your medications stay with you throughout the journey.
Bring extra supply beyond your trip length. If your trip gets extended due to weather, emergencies, or changes in plans, you need sufficient medication. Pack at least three extra days’ worth, more for longer trips.
Research medication regulations for every country you’re visiting, including layover destinations. Some countries require advance permission to bring in certain medications. Apply for these permits weeks before departure—they’re not instant approvals.
For controlled substances, bring copies of prescriptions and doctor’s letters in addition to the originals. Keep these documents with your medications so you can quickly prove legitimacy if questioned.
Forgetting a Basic First-Aid and Comfort Kit
Certain items you rely on at home are difficult or impossible to find abroad. Brand-specific medications, particular formulations, or products marketed under different names create frustration when you need them in a foreign country.
Common items travelers struggle to find internationally include: your preferred pain reliever brand (Tylenol, Advil, or Aleve), specific allergy medications, motion sickness remedies, anti-diarrheal medicine, heartburn relief, and American-style adhesive bandages.
Even when you find similar products, instructions are in foreign languages, dosages differ from what you’re accustomed to, and you’re never quite sure you’re buying the right thing. This wastes vacation time and creates unnecessary stress.
The perfect travel health kit includes essentials you might need: pain relief (both acetaminophen and ibuprofen cover different types of pain), digestive aids (anti-diarrheal and antacids for unfamiliar foods), antihistamines (for unexpected allergic reactions), basic bandages (various sizes for blisters or minor cuts), antibiotic ointment, and any prescription medications.
Quick comfort additions that improve travel experience include: eye mask and earplugs (essential for sleeping on planes and in unfamiliar hotel rooms), hand sanitizer (particularly important when clean water isn’t readily available), tissues or travel-size tissue packs (not all countries provide toilet paper in public restrooms), and electrolyte packets (for rehydration after long flights or stomach issues).
Pack blister prevention supplies like moleskin or blister bandages—these are lifesavers when new walking shoes cause problems or you’re covering miles of sightseeing daily. Blisters can completely derail sightseeing plans if left untreated.
Include any personal comfort items that help you feel normal: favorite tea bags, specific snacks, or small luxuries that aren’t available abroad. These tiny touches of home provide comfort when you’re jet-lagged and adjusting to a new environment.
Store your health kit in a clear, labeled pouch for easy access and quick security screening. You’ll appreciate having everything organized in one place when you need something at 2 AM in a hotel room.
In Closing
Let’s recap the 10 critical packing mistakes that sabotage international trips—and the simple solutions that prevent them:
Research your destination’s climate and culture before packing a single item. Check airline baggage policies for your specific flights 48 hours before departure. Create a strategic packing list organized by category. Build a capsule wardrobe using the 5-4-3-2-1 method instead of overpacking. Leave your suitcase 75% full for souvenirs and purchases. Use packing cubes to maximize space and stay organized. Wear comfortable, broken-in shoes for travel days. Make copies of critical documents and store them separately. Bring the correct power adapters after researching your destination’s electrical standards. Notify banks and phone carriers of travel plans. Pack medications in original containers with doctor’s notes. Assemble a basic first-aid and comfort kit with items hard to find abroad.
These proven strategies transform packing from a stressful chore into a straightforward process. Simple planning prevents the frustrations that ruin trips: surprise baggage fees, frozen credit cards, forgotten medications, uncomfortable shoes, and chaotic suitcases.
Remember this ultimate truth: less is more when packing for international travel. You can buy most things abroad if you discover you need them. The items you think are essential often stay unused in your suitcase. Packing light gives you freedom, flexibility, and peace of mind.
Your action plan starts now, weeks before your departure date. Create your personalized packing checklist using the categories and strategies from this guide. Gather essential items immediately—universal power adapters, document copies, travel-size toiletries, and packing cubes. Don’t wait until the last minute.
Start packing 2-3 days before departure, not the night before. This timeline lets you think clearly, remember forgotten items, and pack strategically without panic. You’ll sleep better the night before your flight knowing everything is ready.
Mastering the art of packing transforms your entire travel experience. You’ll breeze through airports with confidence, stay organized throughout your trip, and focus on creating incredible memories instead of dealing with packing disasters. These easy, effective tips make you a prepared, confident international traveler.
Your next adventure starts with perfect packing. You’ve got the knowledge, the strategies, and the checklist. Now it’s time to put these proven techniques into action. Pack smart, travel light, and enjoy every moment of your international journey—stress-free and ready for anything.
Safe travels, and may your suitcase always close easily on the first try!