31 Hotel Safety Tips for Solo Female Travellers: The Complete Security Playbook
The World Is Calling — And You Should Answer
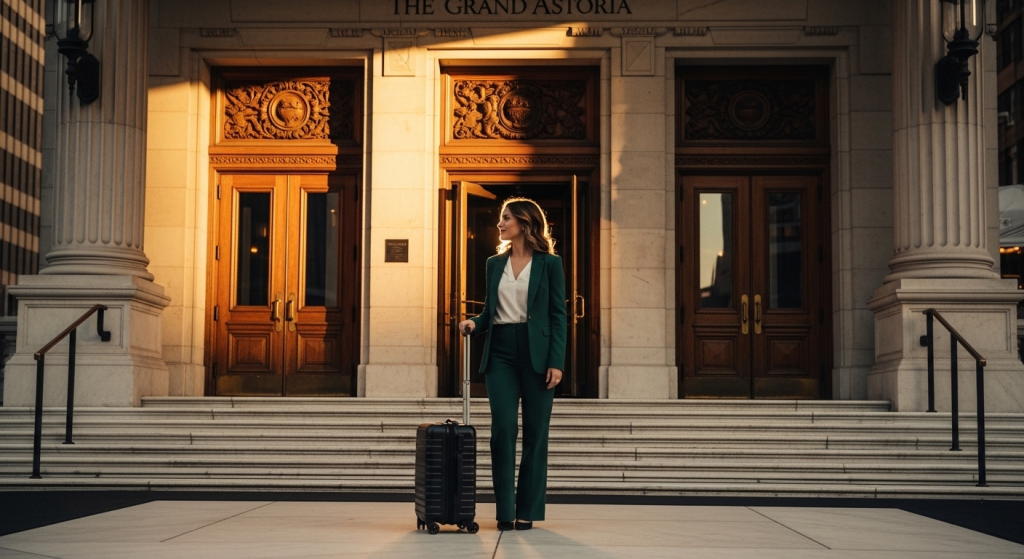
The numbers don’t lie. Solo female travel has exploded into one of the defining cultural movements of our era. Searches for “solo female travel” have tripled since the pre-pandemic peak. The hashtag #solotravel commands over 6.5 billion views on TikTok alone. And according to data from the largest ongoing global study of solo female travel, 45% of women plan to travel alone in 2025, up from 37% the year before.
Women are booking hotels, hopping on planes, and claiming the world as their own — not waiting for permission, not waiting for a partner, not waiting for the “right time.” And they are right to do so.
But here is the honest truth that sits alongside the excitement: of the thousands of women surveyed in annual solo travel studies, 88% reported feeling their safety was threatened in some way while traveling alone. Safety concerns are not paranoia. They are a reasonable, data-backed response to a world that is not yet equally safe for everyone. A full 62% of solo female travellers report that safety or crime rates are a significant factor in choosing their destination.
The good news? Most of those threats are manageable. Most of those risks are mitigable. And a huge proportion of them center on one specific environment that every traveller passes through: the hotel.
Your hotel room should be your sanctuary — the one place during your trip where you can fully decompress, recharge, and feel genuinely at ease.
But the moment you walk through the front door of any property, you enter an environment with real vulnerabilities. Public lobbies, shared elevators, long anonymous corridors, rooms that dozens of strangers have occupied before you — all of it requires a degree of situational awareness and preparation that most travellers simply never think about.
This guide is that preparation. It is not about fear. It is not about discouraging you from getting on that plane. It is about giving you the knowledge, the protocols, and the tools to transform your hotel stay into the safe base camp it should be — so you can go explore the world with complete confidence.
Let’s go through this step by step, the way a security professional would.
Part One: Before You Even Walk Through the Door — Choosing the Right Hotel
Hotel safety begins before you arrive. The security decisions you make at the booking stage will shape every moment of your stay.
Choose properties with 24-hour staffed front desks. This sounds obvious, but many budget properties — boutique hotels, small guesthouses, hostels — operate with skeleton overnight staff or rely on key lockboxes for late arrivals. In a security situation, you want a human being at a desk, not a phone number for a manager who lives 20 minutes away.
Research the neighbourhood. Read reviews specifically for mentions of the surrounding area’s safety, particularly after dark. Solo female travel communities on platforms like Reddit’s r/solotravel and dedicated apps like Her Smart Move contain first-hand accounts from women who have stayed in the exact properties you’re considering. Local context — whether the hotel is on a well-lit main road or tucked down a quiet side street — matters enormously.
Request a room on an upper floor but below the top. Floors 3 through 6 are considered the security sweet spot by many experts. They are high enough to make unauthorized window access impractical, but low enough that fire department ladders can reach you in an emergency. Avoid ground floor rooms where possible — they are more accessible from the exterior and more exposed to foot traffic.
Ask for a room close to the elevator, not at the end of a long corridor. A short, well-lit path between the elevator and your door reduces the time you are exposed and vulnerable in an empty hallway.
Pack your security kit before you leave home. Your hotel safety toolkit is lightweight, inexpensive, and transformative. At minimum it should include: a portable door wedge alarm, a universal door lock, and ideally a small RF/lens detector for camera sweeps. We’ll explain each of these in detail throughout this guide. The point is: the time to research and purchase these items is before your trip, not after you’re standing in a foreign hotel room wondering if you should have.
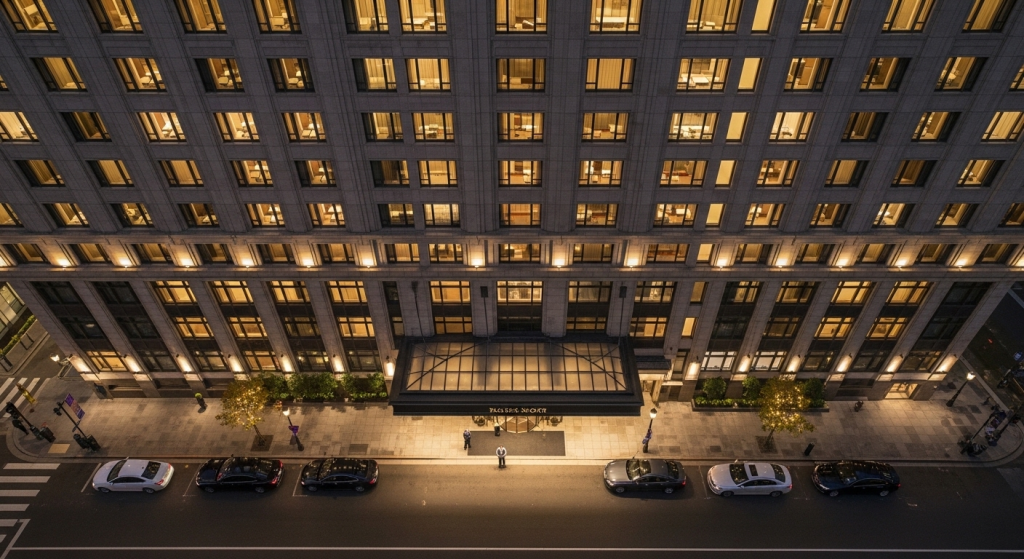
Part Two: Arriving at the Hotel — Your First Line of Defence
You’ve landed. You’re tired, possibly jet-lagged, carrying luggage, and navigating an unfamiliar environment. This is precisely the moment your guard tends to drop — and precisely the moment you most need to keep it up.
Always Use the Main Entrance
This might seem like common sense, but it is worth stating explicitly: every time you enter or leave the hotel, use the main lobby entrance. Not the side door. Not the back service entrance. Not the loading dock shortcut that shaves thirty seconds off your walk. The main entrance.
Why does this matter so much? The main entrance is where camera coverage is densest, where lighting is brightest, where staff are present, and where other guests are moving. It is the most supervised space in the entire property. Side entrances and stairwells — particularly external ones or those accessed from parking structures — are the opposite of all of those things. They are under-monitored, poorly lit, and rarely trafficked. They are exactly the kind of isolated environment that creates opportunity for someone with bad intentions.
Stay in the front of the hotel, in well-lit public areas, particularly when you are waiting for transport, checking your phone, or orienting yourself. Position yourself near the concierge desk or the main seating area, not near a quiet corner or an exit. You are harder to approach and easier to assist in a visible, populated space.
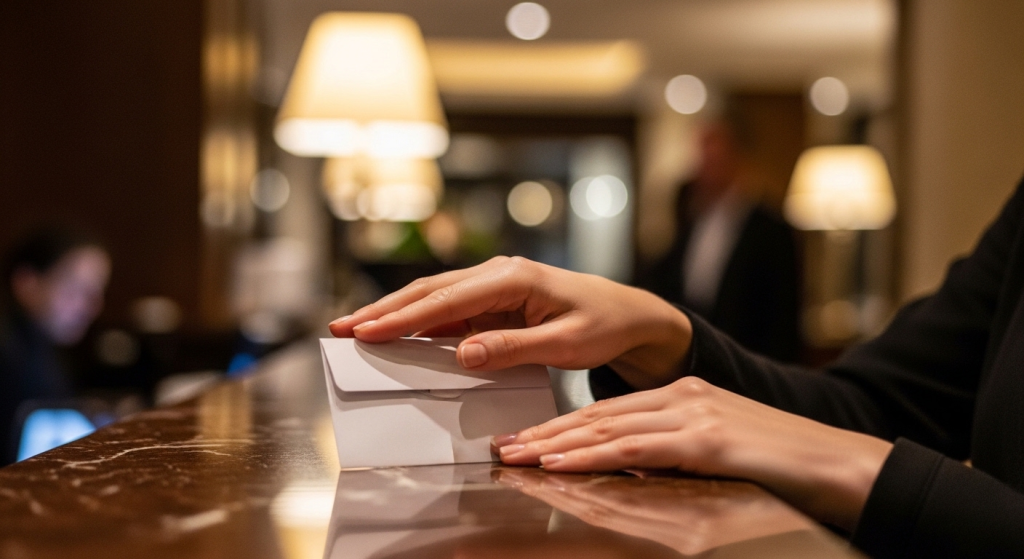
The Check-In: Guard Your Information Like an ATM
The check-in process involves an exchange of sensitive information that most travellers conduct in complete public. Think about what actually happens: you hand over identification, you confirm your booking, and the staff member — who may lower their voice or absolutely may not — tells you your room number and hands you a key envelope with that number written on it.
Treat this moment like an ATM transaction. Just as you would shield your PIN from anyone standing behind you at a cash machine, shield your key envelope and any spoken room number from anyone in the vicinity.
Reputable hotels train front desk staff never to call out your room number aloud — and if they do, it is perfectly acceptable (and advisable) to politely ask them to write it down instead. But even whispered, the number is on your envelope, visible to anyone standing close enough to glance at it. Keep that envelope face-down or immediately in your pocket.
If you sense that someone has been observing your check-in — watching which way you walk, noting your luggage, paying particular attention — tell the front desk staff. They can arrange for an escort to your room, which most hotel security protocols allow for.
Do not announce your travel status. Avoid conversations in the lobby that reveal you are travelling alone, how long you are staying, or what your daily schedule is. This information is useful to exactly the kinds of people you do not want to have it.
Part Three: The Elevator — A Surprisingly High-Risk Space

The hotel elevator is one of the most overlooked security environments in the entire property. It is a small, enclosed, access-controlled space with no easy exit. Understanding how to use it safely is one of the most practical skills in this entire guide.
Elevator Rule #1: Don’t Press Your Floor Until the Doors Close
This is a simple but powerful habit. If you press your floor button while others are still boarding, you have announced your destination to everyone who can see the panel. Once the doors close and you have a sense of who is in the elevator with you, then press your floor.
If you feel uncomfortable with the other person or people in the elevator, you have options. You can step off at the next floor and wait for another car. You can press the lobby button and return downstairs. You are never obligated to ride an elevator to your floor with someone who makes you uneasy.
Elevator Rule #2: Let Others Select Their Floor First
This is tactical awareness in action. By letting others press their floor before you press yours, you gather information. You learn where they’re going without revealing where you’re going. If someone selects the same floor as you, you can reassess before the doors open.
Elevator Rule #3: Stand Near the Panel
When you’re in an elevator, position yourself near the control panel — not in the back corner. This gives you immediate access to all buttons, including the alarm button. Take a mental note of where the alarm is the moment you board. You should be able to locate and press it without looking.
Elevator Rule #4: If Something Feels Wrong, Return to the Lobby
Trust your instincts. If someone boards the elevator and you feel uneasy — for any reason, no matter how difficult it is to articulate — you have every right to change your plans. Step off the elevator before it moves. Return to the lobby. Wait.
If you reach your floor and you suspect someone has followed you, do not exit. Stay in the elevator and press the lobby button. Go back down, tell the front desk what happened, and ask for assistance getting to your room. This is not an overreaction. This is exactly what the protocol exists for.
Part Four: The Walk to Your Room — The Last Exposed Corridor
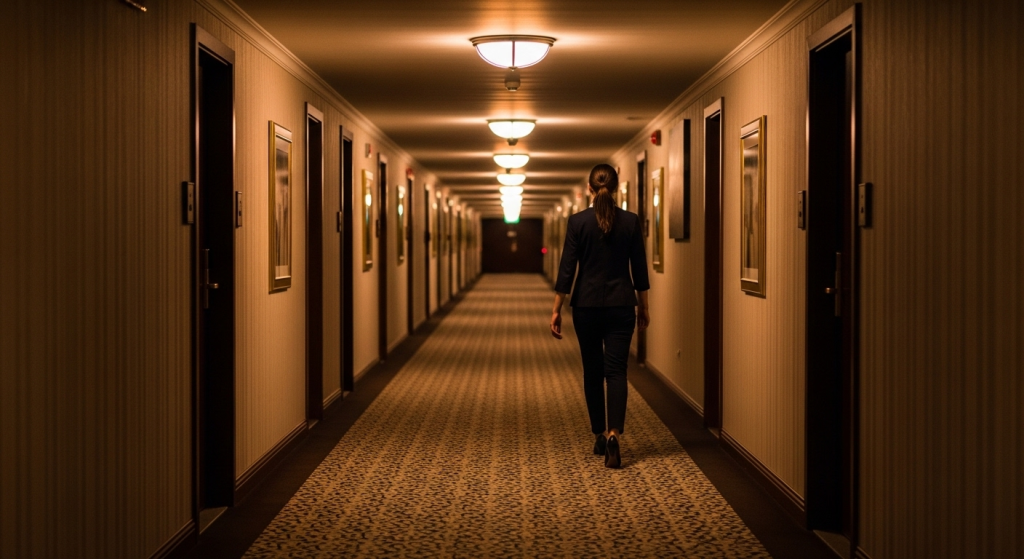
You’ve exited the elevator on the right floor. You’re walking to your room. This 30-to-60-second window is your final period of exposure before you reach the safety of your locked door.
Before you walk, take a glance down the corridor. If something feels off — if someone is loitering, if a door is ajar unusually, if you sense something you cannot immediately explain — go back to the elevator. You are not being dramatic. You are being safe.
When you reach your door, do a quick backward scan. Has anyone emerged from the elevator behind you? Has anyone appeared from a side corridor? Be aware. If someone has followed you from the elevator to your floor, you do not want them to see which specific room is yours. In that situation, keep walking past your door, return to the elevator, and go back to the lobby.
Enter your room quickly and decisively. Have your key card ready before you approach the door — not fumbling in your bag while standing in the hallway. The less time you spend in the corridor, the better.
Part Five: Inside Your Room — The Security Sweep
You’re inside. The door is closed. Now the work begins.
The First Two Actions: DND and Lock
The moment you close the door behind you, do two things immediately, in this order:
- Hang the Do Not Disturb sign on the outside handle. Do this even if you are only planning to be in the room for ten minutes. The DND sign signals to anyone passing — staff or otherwise — that the room is occupied and should not be approached. It removes the opportunity for anyone to knock, claim a maintenance issue, and attempt to gain entry.
- Lock the door completely. Use every locking mechanism available: the main lock, the deadbolt, and the security chain or bar if the room has one. In many hotels, the standard keycard lock alone is the minimum. The deadbolt is a significant additional barrier. The chain is a further one. Use all of them.
The Security Sweep: Your 2-3 Minute Protocol
Now, before you unpack, before you kick off your shoes, before you collapse onto the bed — run your security sweep. This takes two to three minutes and it is one of the most important habits you can develop as a solo traveller.
Step 1: Check the physical hiding spots.
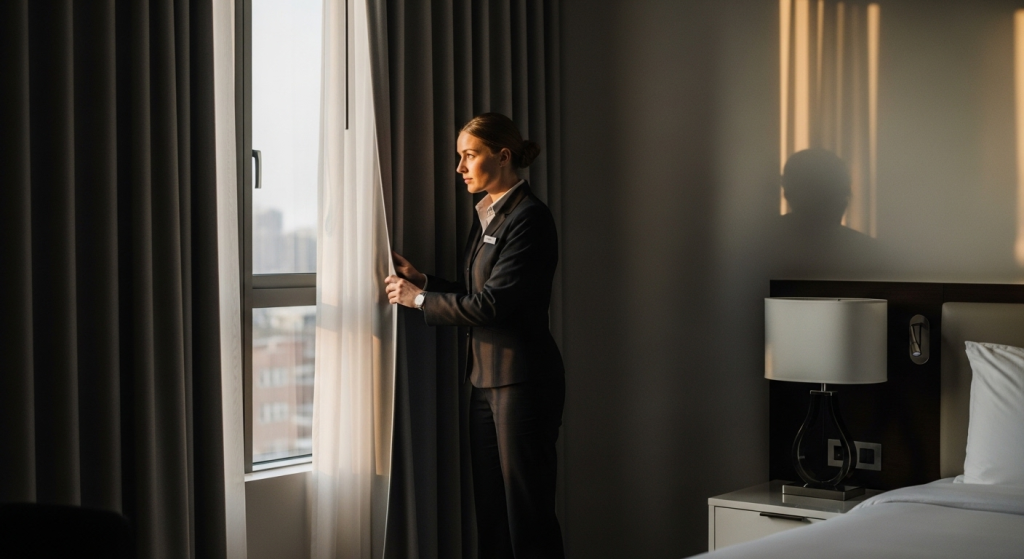
Open the wardrobe. Look inside it. Check behind hanging clothes (if any are there from a previous guest, report this to the front desk immediately — it is a significant red flag). Check behind curtains and drapes, particularly floor-length ones. Check the bathroom, including behind the shower curtain or door and any storage areas. A quick, methodical walk-through of all concealed spaces takes less than ninety seconds and eliminates a category of threat entirely.
Step 2: Inspect the door locks and peephole.
Examine the deadbolt and chain lock to make sure they have not been tampered with. A compromised deadbolt may not lock properly — test it. Check the peephole from the inside. Some peepholes can be reversed from outside the door by a determined intruder, effectively turning your outward-looking security measure into their inward-facing surveillance tool. If the peephole seems loose, misaligned, or if light is coming through from the outside at an unusual angle, cover it with a small piece of tape or a post-it note for the duration of your stay. You can still use it yourself, but it prevents external viewing.
Step 3: For the Full James Bond — The Electronic Sweep
Here is where we move from standard travel precautions into a more advanced protocol — one that, given recent data, is increasingly worth considering.
Social media posts about hidden cameras in hotel rooms increased nearly 400% in recent years. A 2019 survey found that 11% of respondents had discovered unauthorized recording devices in their accommodation. The technology has become smaller, cheaper, and easier to conceal: modern spy cameras can be embedded in alarm clocks, USB chargers, smoke detectors, picture frames, and tissue boxes, and can stream live footage directly to a remote phone.
The law in most countries is clear — hidden cameras in private guest rooms are illegal without consent — but that has not stopped incidents from occurring in hotels and short-term rentals across the globe.
A full electronic sweep involves three methods:
Visual Inspection: Systematically scan every object in the room that faces the bed, bathroom area, or any place where you would be undressed or in a private moment. Look for objects that seem slightly misaligned, that have small holes, or that seem out of place. Common culprits include alarm clocks, air fresheners, photo frames, smoke detectors, and overly bulky bedside items. Use your phone’s flashlight to illuminate dark corners — camera lenses reflect light and may betray their location with a small glint.
Smartphone Tools: Use your phone’s front-facing camera (which can detect some infrared frequencies that the naked eye cannot) to scan the room, particularly smoke detectors and objects with dark, glossy surfaces. Apps like Fing can scan the hotel’s Wi-Fi network for connected devices with suspicious names like “IP Camera” — though this method has limitations, as wired cameras or SD-card-recording cameras will not appear on the network.
Dedicated RF/Lens Detectors: For travellers who want the highest level of confidence, compact handheld bug detectors are available for purchase on Amazon, generally in the $30–$100 range. These devices detect radio frequency signals (which wireless cameras emit) and use infrared light to identify lens reflections. They are not infallible — CNBC tested several methods across 27 hidden cameras and no single method found them all — but they add a meaningful layer of detection capability that goes well beyond the naked eye. A quality lens detector (the binocular-style type that projects light from a distance) outperformed all other methods in independent testing.
If you find anything suspicious, do not touch it. Leave the room, call the front desk, and ask them to contact local law enforcement. Take photographs of the device if you safely can without disturbing it. You have the right to privacy in your room, and a discovery of this nature should be treated as the serious crime it is.
Part Six: Nighttime Security — Protecting Yourself While You Sleep
You have run your sweep. You have locked the door. Now it is time to sleep — but a few final steps can transform your room from a locked space into a genuinely secure one.
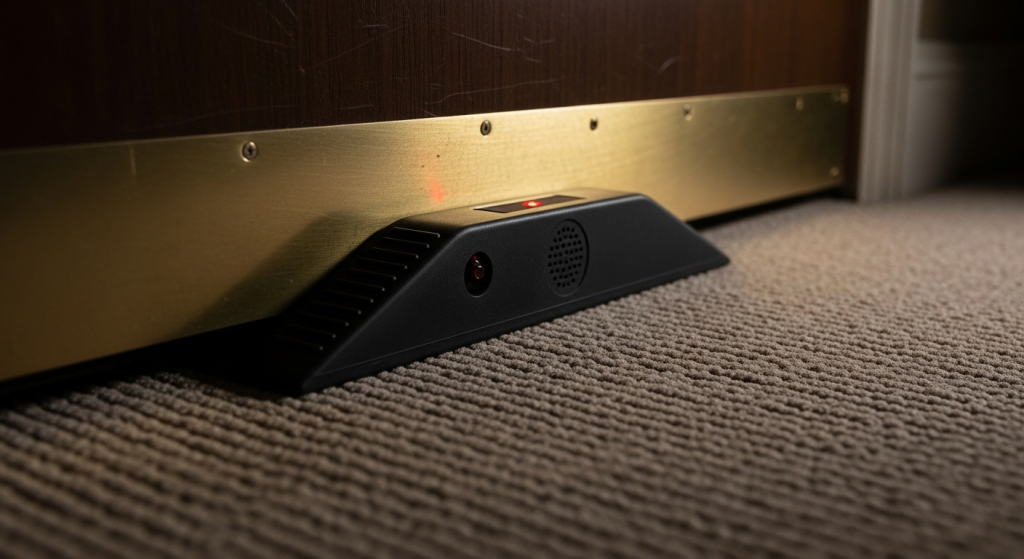
The Wedge Alarm: Your Single Best Investment
A door wedge alarm is one of the most recommended pieces of safety equipment in the solo female travel community — and with good reason. This simple device slides under your door from the inside. It serves a dual purpose: the wedge itself creates physical resistance against the door being opened, and the alarm — triggered by the pressure of the door moving — sounds at a volume typically between 100 and 120 decibels when activated.
To put that in context: a smoke alarm is around 85 decibels. A rock concert is around 110. The wedge alarm is loud enough to wake you instantly, to alert neighbouring rooms and the corridor, and to be deeply discouraging for anyone attempting to enter uninvited. They are small enough to fit in a toiletries bag, they weigh almost nothing, and they cost as little as $10–$20 on Amazon. For the value they provide, they are arguably the most impactful single purchase you can make for your hotel safety.
The Universal Door Lock is another option that complements the wedge alarm for a different type of threat. This small metal device attaches to the door’s existing strike plate and prevents the door from being opened even with a valid keycard, by effectively blocking the latch from retracting. This is particularly useful in hotels where you have doubts about key control — whether keys to your room may have been duplicated or retained from a previous guest.
The Peephole Protocol
Before you open your door to anyone — room service, claimed maintenance staff, housekeeping despite the DND sign — look through the peephole first. If you are not expecting anyone, you are not obligated to open the door. Front desk calls can be verified by calling the desk directly (using the in-room phone, not a number given to you by the person outside the door). Legitimate hotel staff will wait. Anyone who attempts to pressure you to open the door quickly, who claims urgency without prior notice, or who cannot be verified through the hotel’s front desk is someone to report, not to admit.
Part Seven: Additional Tips for the Complete Security Picture
The core protocol above covers your hotel stay from arrival to nighttime. But there are additional layers of preparation and awareness that complete the picture for a solo female traveller:
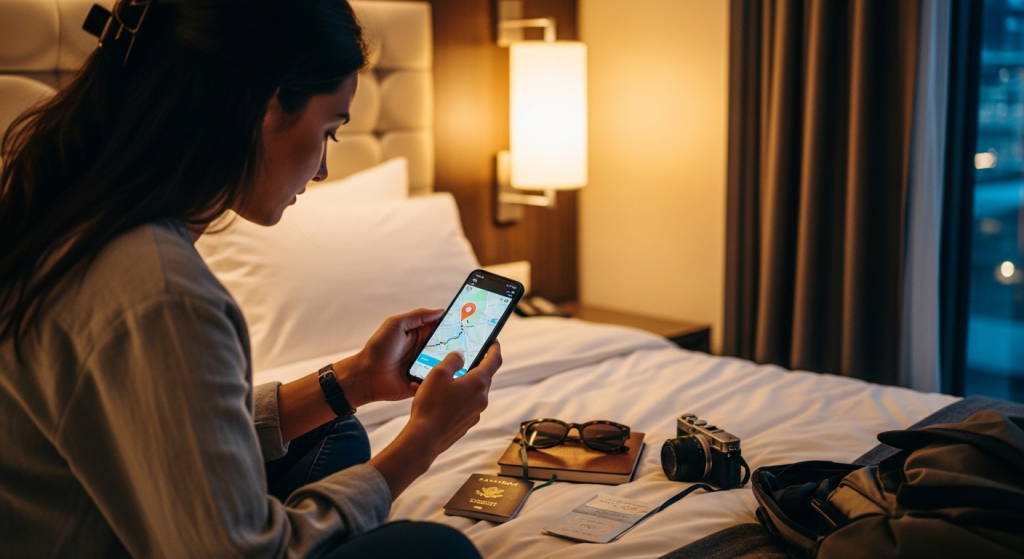
Tell someone where you are. Share your hotel name, address, and room number with a trusted contact at home before you check in. Check in with them regularly. Share your location on Find My Friends, Google Maps, or a similar service. If something were to happen to you, the people who need to look for you should know exactly where to start.
Save the hotel’s direct phone number in your phone — not just the address. If you are out and feel unsafe, a direct call to the front desk asking them to send someone to meet you at the entrance can de-escalate a threatening situation quickly.
Learn the local emergency number for every country you visit. It is not always 911. In the UK it is 999. In Europe broadly it is 112. In Australia it is 000. Knowing this instantly in a moment of panic can be the difference between getting help and fumbling through confusion.
Be mindful of social media. Avoid posting your hotel name or room number publicly while you are still there. Do not broadcast your real-time location to an unknown audience. Post after the fact, from a safe distance.
Trust your instincts absolutely. This bears repeating because it is the most important and least quantifiable piece of advice in this entire guide. If something feels wrong, something is wrong. You do not need to be able to explain it. You do not need evidence. You do not need to avoid embarrassing someone or seeming rude. Your instincts are a security system that has been refined by millions of years of evolution. Trust them. Act on them. Every experienced solo traveller will tell you the same thing.
Use the hotel safe for your passport, extra cash, and valuable electronics when you leave the room. Most in-room safes are basic but sufficient for deterring opportunistic theft.
Consider female-friendly accommodation options. Several hotel chains now offer women-only floors with keycard access restricted to female guests and security staff. Dedicated solo female travel accommodations and female-only hostels have also proliferated, providing not just security but community and connection. The research shows that the presence of other solo female travellers in a destination increases perceived safety for everyone — there is genuine power in this network.
Part Eight: The Mindset — Awareness, Not Anxiety

There is a crucial distinction that every security professional will draw, and it bears making explicit here: the goal of all of this is awareness, not anxiety.
The statistics tell an empowering story, even if they are sometimes cited in alarming ways. Only 12% of solo female travellers report being physically attacked or threatened. The safety concerns that haunt women before their first trip drop significantly with experience — from 78% worried on a first trip to 59% after ten or more solo adventures. The evidence does not support the narrative that solo female travel is uniquely or prohibitively dangerous. In many ways, solo female travellers are safer than their counterparts, because their heightened awareness and prepared habits make them harder targets.
What we are building with this protocol is not a response to near-certain danger. It is the creation of a security habit stack — a set of automatic behaviours that become as natural and unthinking as buckling your seatbelt. You do not buckle your seatbelt because you expect to crash. You do it because the cost of the habit is zero and the cost of not having it, in the rare moment it matters, is everything.
The DND sign. The deadbolt. The quick scan of the closet. The wedge alarm under the door. None of these take more than five minutes in total. None of them will ruin your trip. All of them change the calculus of your security in meaningful ways.
And knowing that you have done them — that you have swept the room, locked the door, placed the alarm, and briefed a trusted contact on your location — is itself a form of freedom. It is the freedom to sleep deeply. To explore boldly. To be fully present in the adventure you came for.
The Quick-Reference Checklist: Hotel Safety for Solo Female Travellers
On Arrival:
- Always use the main entrance; avoid side doors and stairwells
- Stay in front of the hotel, in well-lit camera-covered areas
- Shield your key envelope and room number during check-in (treat it like an ATM)
At the Elevator:
- Don’t press your floor until the doors close
- Let others select their floor first
- Stand near the panel; note where the alarm is
- If someone makes you uncomfortable, return to the lobby
Walking to Your Room:
- Quick scan of the corridor before you walk it
- Have your key ready before you reach the door
- If followed, walk past your room — don’t reveal which one is yours
Immediately Inside the Room:
- Hang the Do Not Disturb sign
- Engage the deadbolt and chain lock
- Run your 2–3 minute security sweep:
- Check closets, behind curtains, bathroom
- Test the deadbolt; check the peephole
- Optional: electronic sweep for hidden cameras
Before Sleep:
- Place wedge alarm under the door
- Verify all locks are engaged
- Share your location with a trusted contact
Throughout Your Stay:
- Never open the door without checking the peephole
- Verify claimed hotel staff through the front desk before admitting them
- Use the in-room safe for valuables
- Trust your instincts — always
Conclusion: The World Is Still Yours
Solo female travel is one of the most meaningful, growth-inducing, perspective-expanding things a woman can do. The world’s greatest cities, most sacred sites, most extraordinary landscapes — they belong to you. They have always belonged to you.
The protocol in this guide does not change that. It deepens it. Because the woman who travels with knowledge and preparation is not a woman constrained by fear — she is a woman who has removed fear as a factor. She has done her checks, packed her wedge alarm, locked her deadbolt, and is now lying in her hotel room bed, fully rested, ready to step out tomorrow and claim another day of her adventure.
That is the real point of all of this. Not caution. Not restriction. Liberation through preparation.
Now go book the trip.
This article is written from a travel and tourism security perspective and is intended for informational purposes. Specific product recommendations (wedge alarms, bug detectors) are provided as general guidance; readers should research options appropriate for their destination and needs. Always comply with local laws regarding any detection or security devices you carry.