14 Best mountain hiking trails
Do you dream of standing at a mountain summit, lungs full of crisp alpine air, gazing at a breathtaking panorama that stretches for miles.
That moment—when the trail’s challenges melt away and nature’s grandeur takes over—is what mountain hiking is all about.
But here’s the thing: finding the perfect trail that matches your skill level, fits your schedule, and delivers that epic experience can feel overwhelming when you’re staring at hundreds of options online.
I get it. When I first started researching mountain hikes, I spent hours clicking through trail databases, reading conflicting reviews, and trying to decode what “moderate” really meant.
My first attempt at a mountain trail taught me this lesson the hard way: I picked a hike that looked “easy” on paper but turned into a grueling eight-hour ordeal because I didn’t understand elevation gain.
I hadn’t packed enough water. I wore cotton socks. And I started at noon—right when afternoon thunderstorms roll in across alpine terrain.
You don’t need to make those same mistakes.
This guide cuts through the noise and delivers what you actually need: specific trail recommendations organized by skill level, real talk about what to expect on each hike, and the essential safety knowledge that keeps mountain adventures unforgettable for the right reasons. Whether you’re a first-timer nervous about tackling your first mountain trail or an experienced hiker hunting for your next epic challenge, you’ll find trails here that match exactly where you are right now.
The mountains are calling. Let’s make sure you answer prepared, confident, and ready to discover why mountain hiking creates memories that last a lifetime.
Why Mountain Hiking Should Be Your Next Adventure

The Physical and Mental Health Benefits
Mountain hiking transforms your body into a powerhouse without ever stepping into a gym. Research from the American Hiking Society shows that hiking uphill burns 40-50% more calories than walking on flat terrain, while the descent works your stabilizer muscles and builds knee strength that protects you from injury. But here’s what most people miss: the elevation itself becomes your training partner. As you climb, your cardiovascular system adapts to thinner air, building red blood cell production and increasing your overall aerobic capacity. You’re literally getting stronger with every vertical foot.
The mental health benefits hit even harder. A Stanford University study found that participants who walked in natural environments showed decreased activity in the prefrontal cortex region associated with depression and rumination. Mountain hiking amplifies this effect because the combination of physical exertion, natural beauty, and achievement creates a neurochemical cocktail of endorphins, serotonin, and dopamine. You’re not just exercising—you’re resetting your entire nervous system.
And then there’s the digital detox factor. Most mountain trails lose cell service within the first mile. That forced disconnection from emails, notifications, and endless scrolling gives your brain the space it desperately needs. When I hiked the Cascade Pass Trail last summer, I didn’t check my phone for six hours. The mental clarity that emerged by mile three felt like wiping fog off a window—suddenly everything came into sharp focus.
Accessible Adventures for Every Skill Level
Here’s the truth that outdoor magazines don’t always emphasize: mountain trails aren’t exclusively for ultra-fit athletes with expensive gear collections. The National Park Service maintains thousands of mountain trails specifically designed for beginners, families, and anyone building confidence in alpine terrain.
The key is understanding trail ratings and elevation gain. A “moderate” trail typically means 500-1,500 feet of elevation gain with some rocky or uneven sections. “Strenuous” usually indicates 1,500+ feet of gain, sustained steep grades, or technical scrambling. But these ratings vary by region—what counts as moderate in Colorado’s high altitude might feel strenuous if you’re coming from sea level.
The beauty of mountain hiking lies in progressive achievement. You start with a two-mile trail that gains 600 feet. That feels challenging. Then you try a four-mile trail with 1,200 feet of gain. Suddenly, that first hike seems easy. Within a season, you’re tackling trails that would have intimidated you months earlier. This progression builds not just physical fitness but genuine confidence in your abilities. You learn to trust your body, read terrain, and push through the mental barriers that say “I can’t do this.”
Unforgettable Scenic Rewards
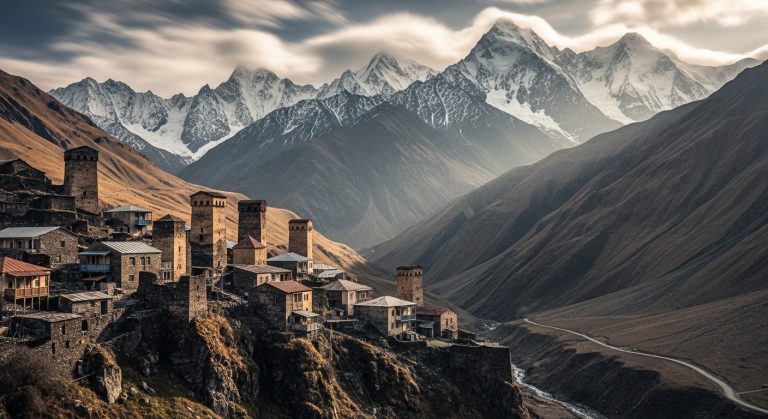
Mountain vistas create lasting memories because they engage all your senses simultaneously. The visual panorama obviously stuns—jagged peaks cutting into impossibly blue sky, valleys dropping away beneath your feet, alpine lakes reflecting surrounding summits like liquid mirrors. But you also feel the temperature drop as you gain elevation, smell the pine and wildflowers mixing with thin mountain air, hear the wind whistling across exposed ridgelines, and taste the cold purity of snowmelt water from your filter.
The diversity of ecosystems you experience from base to summit rivals a road trip across multiple states. You begin in dense forest, transition through meadows exploding with wildflowers, push above treeline into rocky alpine tundra, and possibly reach permanent snowfields or glaciers at the highest elevations. Each zone hosts different plants, animals, and geological features. You’re not just hiking—you’re traveling through multiple worlds in a single day.
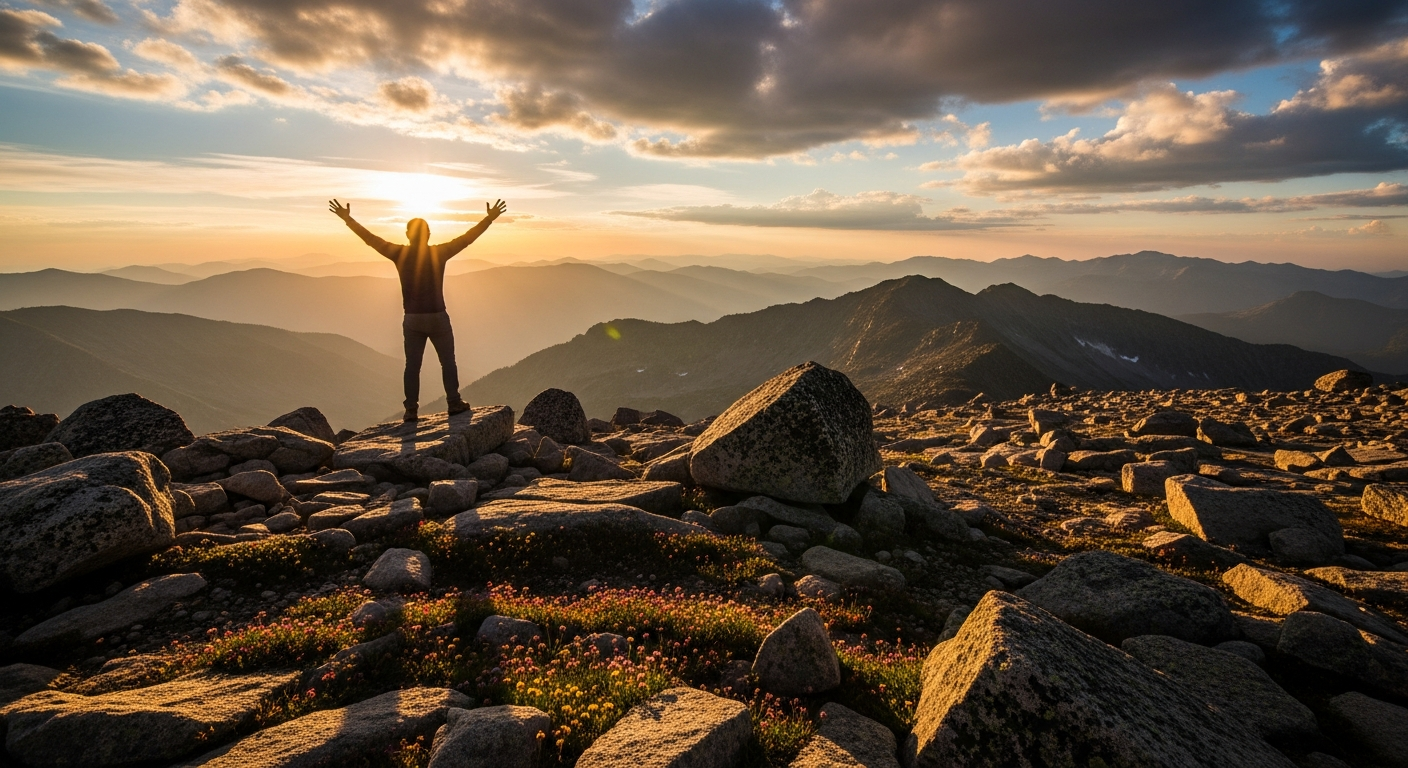
Yes, mountain trails deliver Instagram-worthy moments. That sunrise from a summit, the reflection shot at an alpine lake, the dramatic weather rolling across distant peaks. But the real reward comes from being fully present in those moments rather than experiencing them through a screen. The photos serve as memory triggers, but they’ll never capture the feeling of accomplishment, the communion with wilderness, or the perspective shift that happens when you’re standing somewhere that took genuine effort to reach. That’s what brings people back to mountain trails again and again.
Best Mountain Hiking Trails for Beginners

Cascade Pass Trail, North Cascades National Park, Washington
This 7.4-mile round trip trail delivers world-class alpine scenery without the technical difficulty that intimidates first-time mountain hikers. The 1,800-foot elevation gain climbs steadily but never brutally, and the trail surface stays well-maintained throughout—no scrambling or exposure required.
What makes Cascade Pass perfect for beginners is the reward-to-effort ratio. By mile 3.7, you’re standing in a high alpine basin surrounded by jagged peaks, hanging glaciers, and meadows that explode with wildflowers from July through August. Mountain goats frequently graze near the pass, and on clear days, you can see Johannesburg Mountain, Sahale Peak, and the massive Eldorado Peak creating a 360-degree panorama.
The best season runs from late July through September when the trail is snow-free and wildflowers peak. Here’s the insider tip most online guides skip: arrive before 8 AM. The parking lot holds only about 20 vehicles, and by 10 AM on summer weekends, you’re parking a mile down the road and adding extra distance. The drive itself requires attention—the Cascade River Road is unpaved for the final 20 miles with potholes that punish low-clearance vehicles.
Pack layers. Even if it’s 75°F at the trailhead, the pass frequently sits 20 degrees cooler with wind that cuts through a single fleece. I watched a family turn back at mile 2 because the kids were freezing in t-shirts. Don’t be that family.
Emerald Lake Trail, Rocky Mountain National Park, Colorado
At 3.6 miles round trip, this trail introduces you to Colorado’s high country without the suffering. The route visits three stunning alpine lakes—Nymph Lake, Dream Lake, and Emerald Lake—with each successive destination growing more spectacular. The elevation gain totals just 650 feet, making this manageable even if you’re arriving from sea level.
But here’s what beginners need to understand about hiking at 9,000+ feet: altitude affects everyone differently, and it hits harder than you expect. The trailhead starts at 9,475 feet. If you flew into Denver yesterday and drove straight to Rocky Mountain National Park, you’re asking your body to perform physical activity at elevation it hasn’t adapted to. Symptoms of mild altitude sickness include headache, nausea, dizziness, and fatigue—exactly what you don’t want on a hike.
My recommendation? Spend at least one night in Estes Park (7,500 feet) before attempting this trail. Drink more water than feels necessary—altitude increases fluid loss through respiration. Move slowly. The locals have a saying: “Slow is fast in the mountains.” When you’re gasping for breath on a gentle uphill, remember that’s your body adjusting to 30% less oxygen than sea level.
The lake views justify every labored breath. Emerald Lake sits in a glacial cirque beneath Hallett Peak, its water so clear you can see boulders 20 feet down. Arrive before 7 AM to catch the reflection shot before wind ripples the surface. The trail gets crowded—Rocky Mountain National Park sees 4.5 million visitors annually—but early mornings offer solitude that transforms the experience.
Alum Cave Trail to Mount LeConte, Great Smoky Mountains, Tennessee
This trail offers beautiful flexibility for beginners unsure about their limits. The hike to Alum Cave Bluffs covers 5 miles round trip with 1,400 feet of elevation gain—a solid introduction to mountain hiking. But if you’re feeling strong at the bluffs, you can continue another 5.5 miles to Mount LeConte’s summit, turning a beginner hike into an intermediate challenge.
The geological features make this trail unforgettable. Around mile 2.3, you reach Arch Rock, where the trail passes through a natural tunnel formed by massive boulders. Shortly after, Alum Cave Bluffs create a 100-foot concave cliff that sheltered Cherokee hunting parties and Civil War saltpeter miners. The “cave” isn’t technically a cave—it’s a massive overhang—but the scale impresses.
What I love about this trail for beginners is how it teaches mountain hiking fundamentals without overwhelming you. You’ll encounter exposed sections with cable handrails, steep stone steps, and dramatic drop-offs—all the elements of more advanced trails but in manageable doses. It’s like a practice run for bigger adventures.
The Smokies’ weather patterns differ from Western mountains. Afternoon thunderstorms are less predictable, but fog and rain can roll in any time. The park receives 85 inches of annual rainfall, making waterproof gear essential year-round. Summer temperatures at the trailhead reach the 80s, but the summit of Mount LeConte stays 10-15 degrees cooler.
Essential Beginner Tips for Mountain Trails
Understanding trail ratings saves you from my early mistakes. When a trail description says “moderate,” check the specific elevation gain and mileage. A moderate 4-mile trail with 2,000 feet of gain is vastly different from a moderate 4-mile trail with 600 feet of gain. Always calculate feet per mile—anything over 500 feet per mile qualifies as steep.
The 10 Essentials aren’t optional, even on short beginner trails. Navigation tools (map and compass), sun protection, insulation layer, illumination (headlamp), first-aid supplies, fire starter, emergency shelter, extra food, extra water, and repair kit. I’ve used my headlamp on “short” hikes that ran longer than expected. I’ve deployed my emergency blanket when a friend started showing hypothermia symptoms. These items live in my pack for every single hike.
Pacing determines success more than fitness level. Start slower than feels necessary. If you can’t hold a conversation while hiking uphill, you’re moving too fast. Use the rest step technique on steep sections: lock your downhill knee briefly with each step, transferring weight to your skeleton instead of muscles. Take breaks every 20-30 minutes to drink water, eat snacks, and let your heart rate settle.
And learn to recognize when to turn around. Weather deteriorating? Turn around. Feeling dizzy or nauseous? Turn around. Trail conditions beyond your skill level? Turn around. The summit will still be there next time. Pushing beyond your limits turns adventures into emergencies.
Epic Intermediate Mountain Trails Worth the Challenge

Half Dome, Yosemite National Park, California
Half Dome represents the ultimate bucket-list hike for intermediate hikers ready to level up. This 14-16 mile round trip with 4,800 feet of elevation gain culminates in ascending the final 400 feet via steel cables bolted into the granite face. You’re pulling yourself up a 45-degree slope where a slip means serious injury or worse. The exposure is real. The achievement is unforgettable.
The permit system frustrates many hikers, but it exists for good reason. Yosemite limits daily Half Dome permits to 300 hikers to prevent dangerous overcrowding on the cables. You’ll need to enter the preseason lottery in March (225 permits) or try the daily lottery two days before your hike (50 permits). The lottery costs $10 to enter plus $10 per person if selected. Apply for multiple dates to increase your odds.
Here’s what the permit descriptions don’t adequately convey: this hike demands respect and preparation. Start by 5 AM—earlier if possible. The cables come down after October, but even during summer, afternoon thunderstorms create lethal conditions on exposed granite. Lightning strikes Half Dome regularly. If you hear thunder or see dark clouds building, get off the cables immediately.
Physical preparation matters. Practice hiking with a loaded pack on steep terrain. Build grip strength—your forearms will burn on the cables. Bring gloves (gardening gloves work fine) to protect your hands on the steel cables. The National Park Service reports that the cables are “easier than they look,” but that’s relative. If you’re afraid of heights, this final section will test you mentally as much as physically.
The view from the top spans the entire Yosemite Valley, with Clouds Rest, Tenaya Canyon, and the High Sierra spreading in all directions. That moment when you step onto the flat summit and realize what you just accomplished—that’s why people call this a life-changing hike.
Mount Washington via Tuckerman Ravine, New Hampshire
Mount Washington holds the distinction of having “the world’s worst weather,” with the highest surface wind speed ever recorded—231 mph in 1934. This 4.2-mile one-way hike gains 4,250 feet through Tuckerman Ravine, a glacial cirque famous for spring skiing and year-round avalanche danger. You’re climbing the Northeast’s most notorious peak, and it deserves every bit of that reputation.
The weather changes faster here than anywhere in the Lower 48. I’ve experienced 70°F sunshine at the trailhead and 35°F with 50 mph winds at the summit—in July. The summit weather station records average wind speeds of 35 mph and temperatures that rarely exceed 60°F even in summer. Hypothermia kills hikers on Mount Washington every year, usually people who started in warm conditions and got caught unprepared by rapid weather changes.
Your preparation checklist must include: full rain gear (jacket and pants), insulating layers (fleece or puffy jacket), hat, gloves, goggles or sunglasses, extra food, and more water than you think you need. Pack all of this even if the forecast looks perfect. The forecast is often wrong on Mount Washington.
The trail itself is straightforward until you reach the headwall of Tuckerman Ravine. This steep bowl requires scrambling over boulders and navigating loose rock. Above the ravine, the trail follows cairns across alpine tundra where vegetation can’t survive the harsh conditions. Stay on marked trails—the fragile alpine plants take decades to recover from footsteps.
If you reach the summit, you’ll find a visitor center, weather observatory, and the cog railway terminus. Yes, tourists arrive by train while you earned it the hard way. That contrast makes your achievement even sweeter. Sign the summit register, take your photos, then descend immediately if weather threatens. More accidents happen during descent when fatigue sets in and focus wavers.
Longs Peak Keyhole Route, Rocky Mountain National Park, Colorado
Longs Peak stands as Colorado’s most iconic 14er, and the Keyhole Route provides the “easiest” way to reach its 14,259-foot summit. Don’t let “easiest” fool you—this 15-mile round trip with 5,100 feet of elevation gain includes Class 3 scrambling, extreme exposure, and altitude that leaves even fit hikers gasping.
The alpine start is non-negotiable. Begin hiking by 3 AM. Yes, 3 AM. Lightning strikes the summit almost daily during summer afternoons, and you need to be descending by noon. The standard advice is “be off the summit by noon,” but better advice is “be off the summit by 10 AM.” Afternoon thunderstorms build fast in the Rockies, and being caught above treeline in a lightning storm ranks among the most terrifying outdoor experiences possible.
The route breaks into distinct sections. The approach to the Boulder Field (6 miles, 2,700 feet of gain) follows a well-maintained trail. At the Boulder Field, you’ll see the Keyhole—a distinctive notch in the ridgeline. Beyond the Keyhole, the trail becomes a route marked by painted yellow and red bullseyes on rocks. You’ll traverse the Ledges, a narrow path across the west face with hundred-foot drops. Then comes the Trough, a steep gully filled with loose rock. The Narrows follow—a narrow ledge traverse that requires handholds and tests your comfort with exposure. Finally, the Homestretch presents a steep slab where many hikers turn around because the exposure overwhelms them.
Class 3 scrambling means using your hands for balance and occasionally for upward progress. It’s not technical climbing, but it’s not hiking either. If you slip on Class 3 terrain, you’re likely to get hurt. Practice scrambling on easier peaks before attempting Longs. Mount Audubon or Mount Bierstadt provide good training grounds.
Altitude sickness strikes many Longs Peak attempts. Starting at 9,400 feet and climbing to 14,259 feet gives your body minimal time to adjust. Acclimatize by spending several days at elevation before your attempt. Recognize the symptoms: headache, nausea, dizziness, fatigue, loss of appetite. Mild symptoms might improve with rest and hydration. Moderate to severe symptoms require immediate descent.
The summit views reward your effort with a 360-degree panorama of Rocky Mountain National Park, the Indian Peaks Wilderness, and endless Colorado ranges fading into the distance. You’ll feel on top of the world—because you practically are.
Angels Landing, Zion National Park, Utah
This 5.4-mile round trip hike has achieved legendary status for its final half-mile section: a narrow spine of rock with 1,000-foot drops on both sides and chains bolted into the rock for assistance. The 1,488-foot elevation gain is moderate by mountain standards, but the psychological challenge of the chains section creates an intermediate-level experience.
Zion recently implemented a permit system for Angels Landing after overcrowding created dangerous bottlenecks on the chains. You’ll need to enter the seasonal lottery (applies three months in advance) or the day-before lottery. The permit costs $6 to apply plus $3 per person if selected. This system reduced traffic and improved safety, but it also means you can’t spontaneously decide to hike Angels Landing.
The approach follows the West Rim Trail through Refrigerator Canyon, then climbs Walter’s Wiggles—21 steep switchbacks engineered into the cliff face. At Scout Lookout, you reach the decision point. The viewpoint here offers spectacular views without the chains. Many hikers stop here, and there’s no shame in that choice. The chains section is optional, not mandatory.
If you continue, you’re committing to a narrow ridge where passing oncoming hikers requires coordination and patience. The chains provide handholds, but they don’t eliminate the exposure. People freeze up here. People have fatal falls here. The National Park Service reports 16 deaths on Angels Landing since 2000—a sobering statistic that demands respect.
My advice? Go early in the morning when crowds are lighter and temperatures are cooler. Wear shoes with excellent traction—smooth-soled shoes are dangerous on slickrock. Bring gloves to protect your hands on the chains. If you feel your fear overwhelming you at any point, turn around. The view from Scout Lookout is 90% as good as the summit view.
The summit of Angels Landing provides views down Zion Canyon that photographs can’t capture. The Virgin River snakes through the valley floor 1,500 feet below, and the Great White Throne, Cathedral Mountain, and the Organ dominate the landscape. You’ll understand why this hike attracts hundreds of thousands of attempts annually—and why it challenges even experienced hikers.
Advanced and Wild Mountain Adventures for Experienced Hikers

The Presidential Traverse, White Mountains, New Hampshire
The Presidential Traverse covers 23 miles and summits seven peaks over 4,000 feet—including Mount Washington—in a single push. You’ll gain and lose approximately 9,000 feet of elevation through terrain that ranges from forest trails to exposed alpine ridges to boulder scrambling. This is Type 2 fun: miserable while you’re doing it, amazing in retrospect.
The logistics require planning. Most hikers arrange a shuttle by leaving a car at the end trailhead (Appalachia or Valley Way) and starting at the southern terminus (Highland Center or Crawford Path). The traverse typically takes 12-18 hours depending on fitness and conditions. Some hikers complete it in a single day, while others split it into a two-day trip with an overnight at one of the AMC huts or a backcountry campsite.
Weather windows are critical. The Presidential Range sits fully exposed above treeline for miles, and conditions can deteriorate from pleasant to life-threatening within an hour. Check the Mount Washington Observatory’s higher summits forecast, and only attempt the traverse when the forecast shows stable weather for your entire hiking window. If thunderstorms threaten, bail out at one of the several descent trails that drop back to roads.
Bail-out options include Sphinx Trail, Great Gulf Trail, and Jewell Trail—all provide escape routes if weather, injury, or exhaustion forces you to cut the traverse short. Know these options before you start. Pride isn’t worth hypothermia or worse.
Physical preparation for the Presidential Traverse should include back-to-back long hikes with elevation gain. Train with a loaded pack matching your traverse weight. Build mental toughness for continuing when you’re tired, sore, and questioning your life choices. The final miles from Mount Madison to the parking lot test your resolve more than your fitness.
The experience delivers an achievement few hikers can claim. You’ll summit the Northeast’s most iconic peaks in a single epic day, crossing terrain that would take most people a week of separate hikes. The exhaustion feels earned. The memories last forever.
Enchantments Thru-Hike, Washington
The Enchantments represent Washington’s most coveted alpine wilderness—an 18-mile thru-hike through granite peaks, pristine alpine lakes, and scenery that rivals anywhere in the world. The Core Enchantment zone contains over 60 alpine lakes surrounded by larches that turn gold in September, creating photography that looks Photoshopped but isn’t.
The permit system is notoriously competitive. Washington State Parks runs a lottery in February for permits from May through October. The odds hover around 5-10% depending on your dates. Many hikers apply for years before winning. Day hiking is possible but requires starting extremely early and covering 18-20 miles with 6,000+ feet of gain in one day—a brutal proposition.
If you win a permit, you’re committing to a thru-hike that requires careful planning. Most hikers start at the Stuart Lake trailhead (lower elevation) and finish at Snow Lake trailhead, hitting Aasgard Pass in the middle. Aasgard Pass gains 2,000 feet in 0.8 miles—essentially a boulder scramble up a 40-degree slope. Your hands will be on rocks. Your lungs will burn. But the Core Enchantment zone that follows makes every step worth it.
Leave No Trace principles are mandatory, not optional. The Enchantments’ fragile alpine environment can’t handle the thousands of hikers who visit annually without strict adherence to minimum-impact practices. Use designated campsites only. Pack out all waste (yes, all). Stay on durable surfaces. Keep noise levels down. Store food properly to protect wildlife.
The Core Enchantment zone between Aasgard Pass and Prusik Pass contains the iconic views: Prusik Peak reflected in Gnome Tarn, the crystalline waters of Inspiration Lake, the golden larches surrounding Leprechaun Lake in autumn. Camp here if your permit allows. Watch alpenglow paint the granite peaks at sunrise. This is wilderness that changes how you see mountains.
Mount Whitney via Whitney Portal, California
At 14,505 feet, Mount Whitney stands as the highest peak in the Lower 48 states. The 22-mile round trip via the Whitney Portal Trail gains 6,100 feet through multiple climate zones, from pine forest to alpine tundra to the barren summit zone where only rocks and sky exist.
The permit system rivals the Enchantments for difficulty. The Whitney Zone requires permits year-round, with the lottery opening in February for May-November dates. Day hike permits are especially competitive (10-15% success rate), while overnight permits have slightly better odds. Many hikers apply for multiple dates or settle for shoulder season dates in May or October when snow adds difficulty but crowds thin.
Altitude sickness is the primary reason hikers fail to summit Whitney. The trailhead starts at 8,360 feet, and you’re climbing to 14,505 feet—a massive altitude gain that gives your body limited time to adjust. The standard advice is to spend at least one night at elevation (Lone Pine at 3,700 feet or Whitney Portal Campground at 8,000 feet) before your attempt. Better yet, spend several days hiking other peaks in the area to acclimatize gradually.
Recognize altitude sickness symptoms and act immediately if they appear. Mild symptoms (headache, slight nausea, fatigue) might improve with rest, hydration, and slower pace. Moderate symptoms (severe headache, vomiting, dizziness) require descent. Severe symptoms (confusion, loss of coordination, difficulty breathing) constitute a medical emergency requiring immediate descent and possibly rescue.
Training for Whitney should focus on both cardiovascular fitness and mental preparation for long days at altitude. Practice hiking with a loaded pack for 10+ hours. Build leg strength for the relentless uphill followed by knee-pounding descent. Get comfortable with early alpine starts—most successful Whitney hikers begin by 3 AM to avoid afternoon thunderstorms.
The summit views span the Sierra Nevada, with Lone Pine Peak, Mount Russell, and endless granite peaks creating a landscape that feels more like the Himalayas than California. The summit registry contains thousands of names, each representing a personal victory over altitude, distance, and doubt. Add yours to the list.
Glacier Gorge to Sky Pond, Rocky Mountain National Park, Colorado
Sky Pond sits in a remote glacial cirque beneath the dramatic east face of Taylor Peak, accessed via a 9-mile round trip that includes waterfall scrambles and rock-hopping that separates casual hikers from committed adventurers. The 1,750-foot elevation gain is moderate, but the technical sections create an advanced experience.
The approach follows the popular Alberta Falls trail before branching toward Glacier Gorge. You’ll pass The Loch, a stunning alpine lake that tempts many hikers to stop early. Continue past The Loch, and the trail becomes less maintained. At Timberline Falls, the route requires scrambling up smooth rock beside the waterfall—potentially slick when wet and intimidating for hikers uncomfortable with exposure.
Above Timberline Falls, the trail continues through boulder fields and alpine terrain to Sky Pond. The reward is a pristine alpine lake surrounded by cliffs and snowfields that persist year-round. The reflection of Taylor Peak in the still water creates one of Rocky Mountain National Park’s most photographed scenes—though you’ll work harder for this shot than the typical tourist viewpoint.
Seasonal considerations matter significantly. Early summer means snow travel above The Loch, requiring microspikes or crampons and ice axe skills. Late summer provides the easiest conditions with minimal snow and lower water levels. Fall brings golden aspen and fewer crowds but also unpredictable weather. Winter transforms the route into a serious mountaineering objective requiring avalanche knowledge and technical equipment.
Technical skills needed include basic scrambling ability, comfort with exposure, and good judgment about when conditions exceed your abilities. If Timberline Falls looks too intimidating, The Loch provides a beautiful turnaround point without shame. If afternoon thunderstorms build, descend immediately—the exposed terrain above treeline is no place to be during lightning.
The solitude you’ll find at Sky Pond contrasts sharply with Rocky Mountain National Park’s crowded tourist corridors. You earned this wilderness through effort and skill. The reflection, the silence, the sense of accomplishment—these rewards belong to hikers willing to push beyond the easy trails.
Family-Friendly Mountain Trails That Kids Will Love
Grinnell Glacier Trail, Glacier National Park, Montana
At 10.6 miles round trip, Grinnell Glacier pushes the limits of what most families consider “kid-friendly,” but the spectacular rewards motivate children to push farther than they thought possible. The 1,600-foot elevation gain climbs steadily but never brutally, and the trail surface stays well-maintained throughout—perfect for confident young hikers aged 8 and up.
The wildlife viewing opportunities rival any trail in the Rockies. Mountain goats frequently graze on cliffs above the trail, bighorn sheep appear near Grinnell Lake, and marmots whistle from boulder fields. Black bears and grizzly bears inhabit the area, making bear spray essential and proper food storage mandatory. Use this as a teaching opportunity: show kids how to check for fresh bear scat, make noise around blind corners, and stay calm if you spot a bear at distance.
The trail visits three stunning destinations: Lake Josephine, Grinnell Lake, and finally Grinnell Glacier itself. The glacier has retreated dramatically over the past century—a visible lesson in climate change that resonates with kids more than any classroom lecture. The turquoise meltwater, icebergs floating in the upper lake, and remnant ice clinging to the cirque create scenery that justifies every step.
Making the distance work with kids requires strategy. Start early when temperatures are cool and kids are fresh. Pack more snacks than seems reasonable—trail mix, energy bars, fruit, sandwiches. Take breaks every 30-45 minutes to rest, hydrate, and let kids explore interesting rocks or logs. Set intermediate goals: “Let’s make it to that big tree,” then “Let’s reach the next lake.” Celebrate each milestone.
Bring layers for kids. Mountain weather changes rapidly, and children regulate body temperature less efficiently than adults. A cold, miserable kid will melt down and refuse to continue. Pack rain jackets, fleece layers, hats, and gloves even on warm days.
The sense of accomplishment kids feel after completing this hike builds confidence that transfers to other challenges. They’ll talk about “the time we hiked to a glacier” for years. That’s the magic of family mountain adventures.
Maroon Bells Scenic Loop, Colorado
The Maroon Bells rank as Colorado’s most photographed peaks, and the 1.8-mile loop around Maroon Lake provides stunning views with minimal effort—perfect for families with young children or hikers with mobility limitations. The trail is mostly flat, paved in sections, and includes wheelchair-accessible viewpoints.
The catch? Access requires planning.